If your social media strategy hasn’t changed, your results won’t either. AI is changing workflows, customers are discovering brands differently, and authenticity matters more than ever. Here are ...

14Jan


To help you understand how to Order Online, I will use our E-commerce and POS demo site.
This guide will help you navigate and explore the features of our integrated system. Following the steps below will ensure you make the most of your demo experience.
The following are step by step instructions for walking through the shopping process of ordering any product online on our ecommerce website and also others.
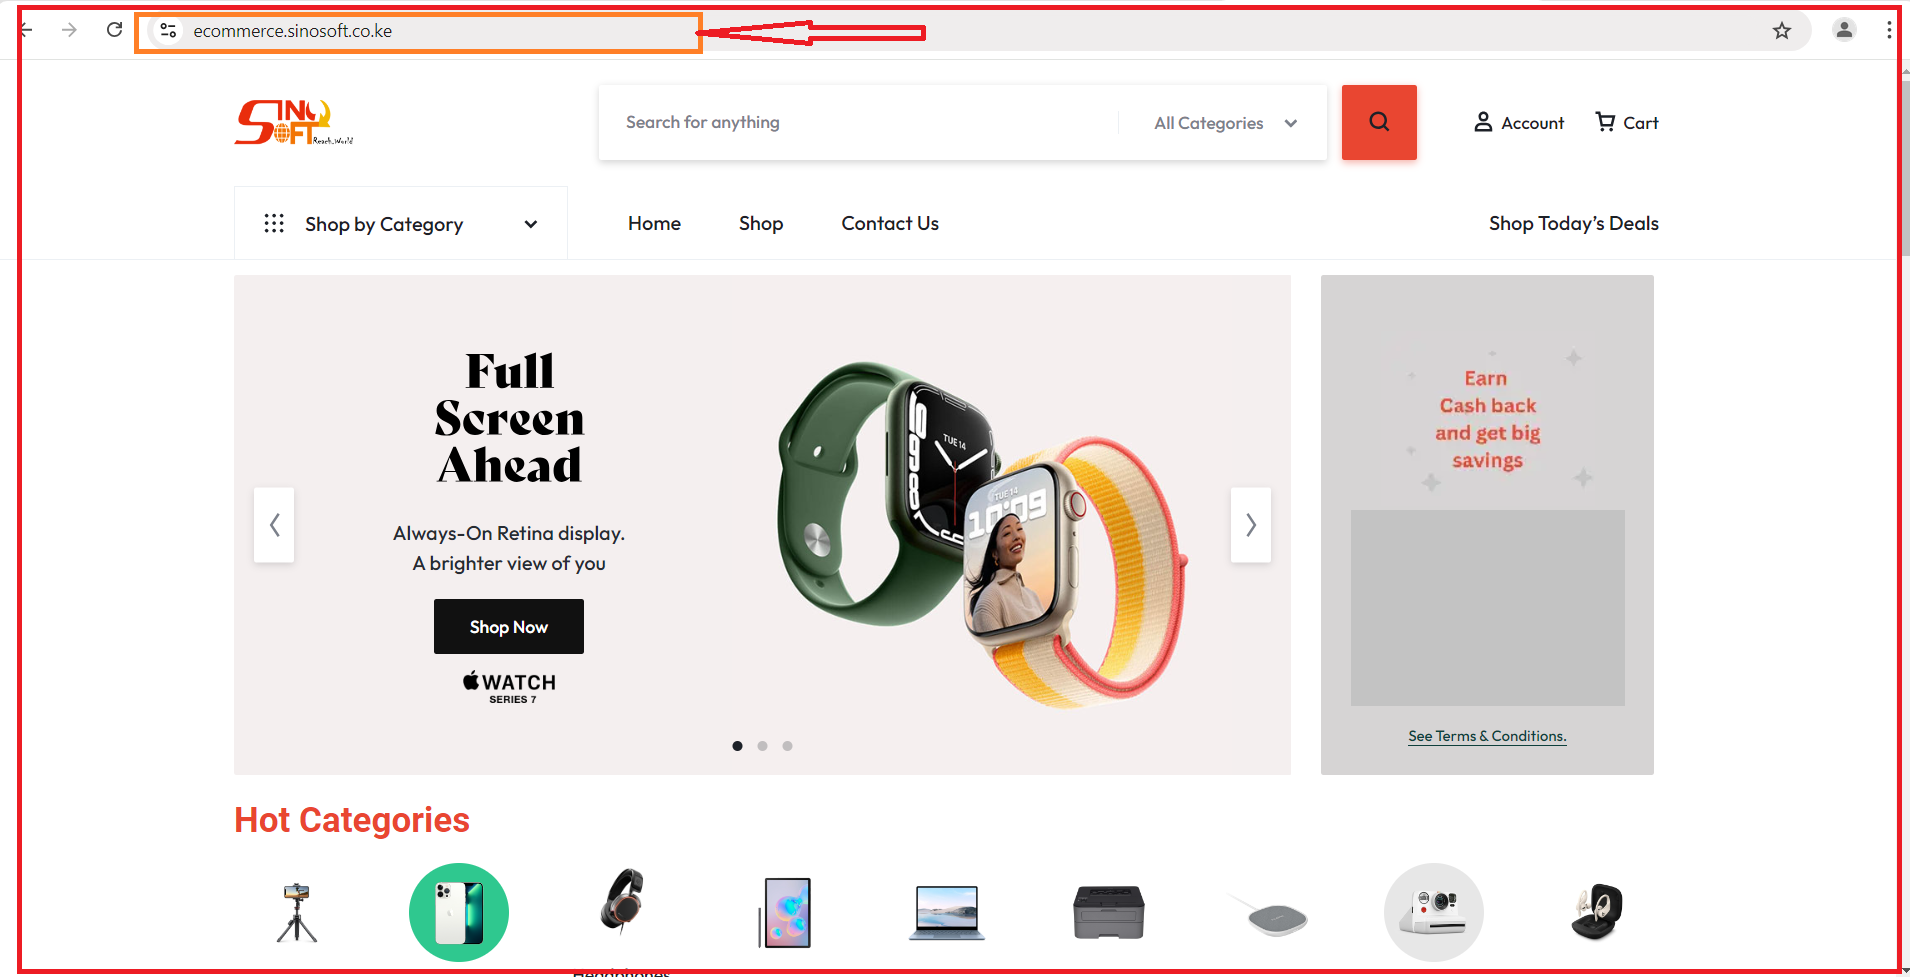
Firstly, on your web browser, type in our URL (https://ecommerce.sinosoft.co.ke/) you will be directed to the home page.
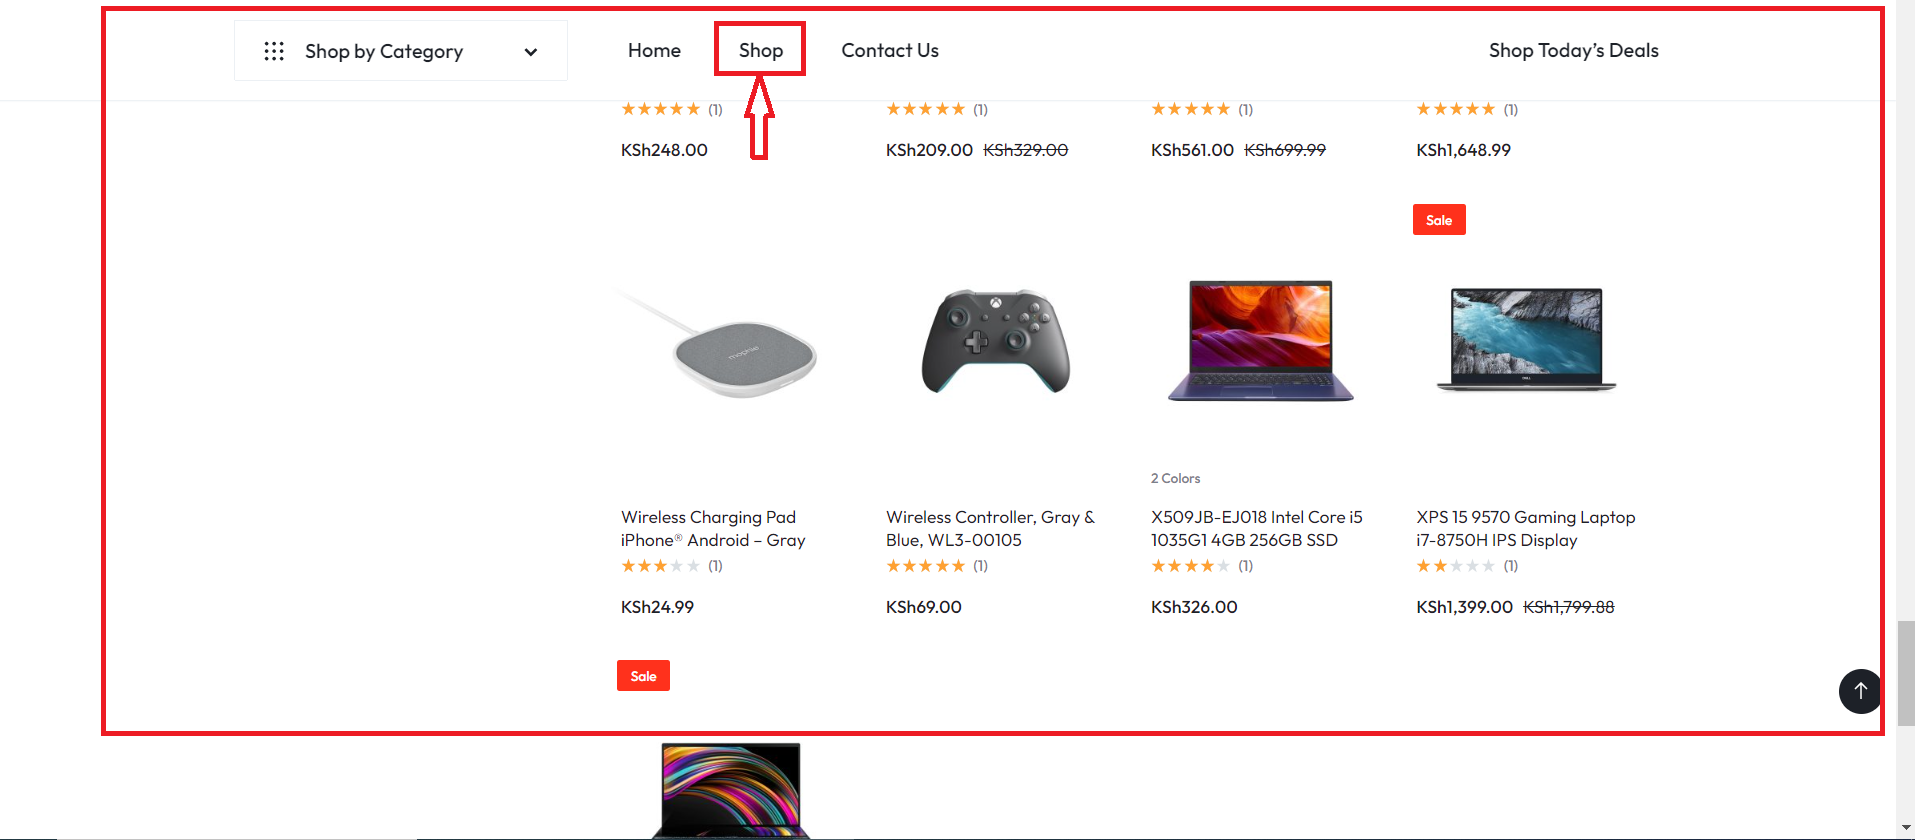
On the home page menu, click "shop" to view the products you want.
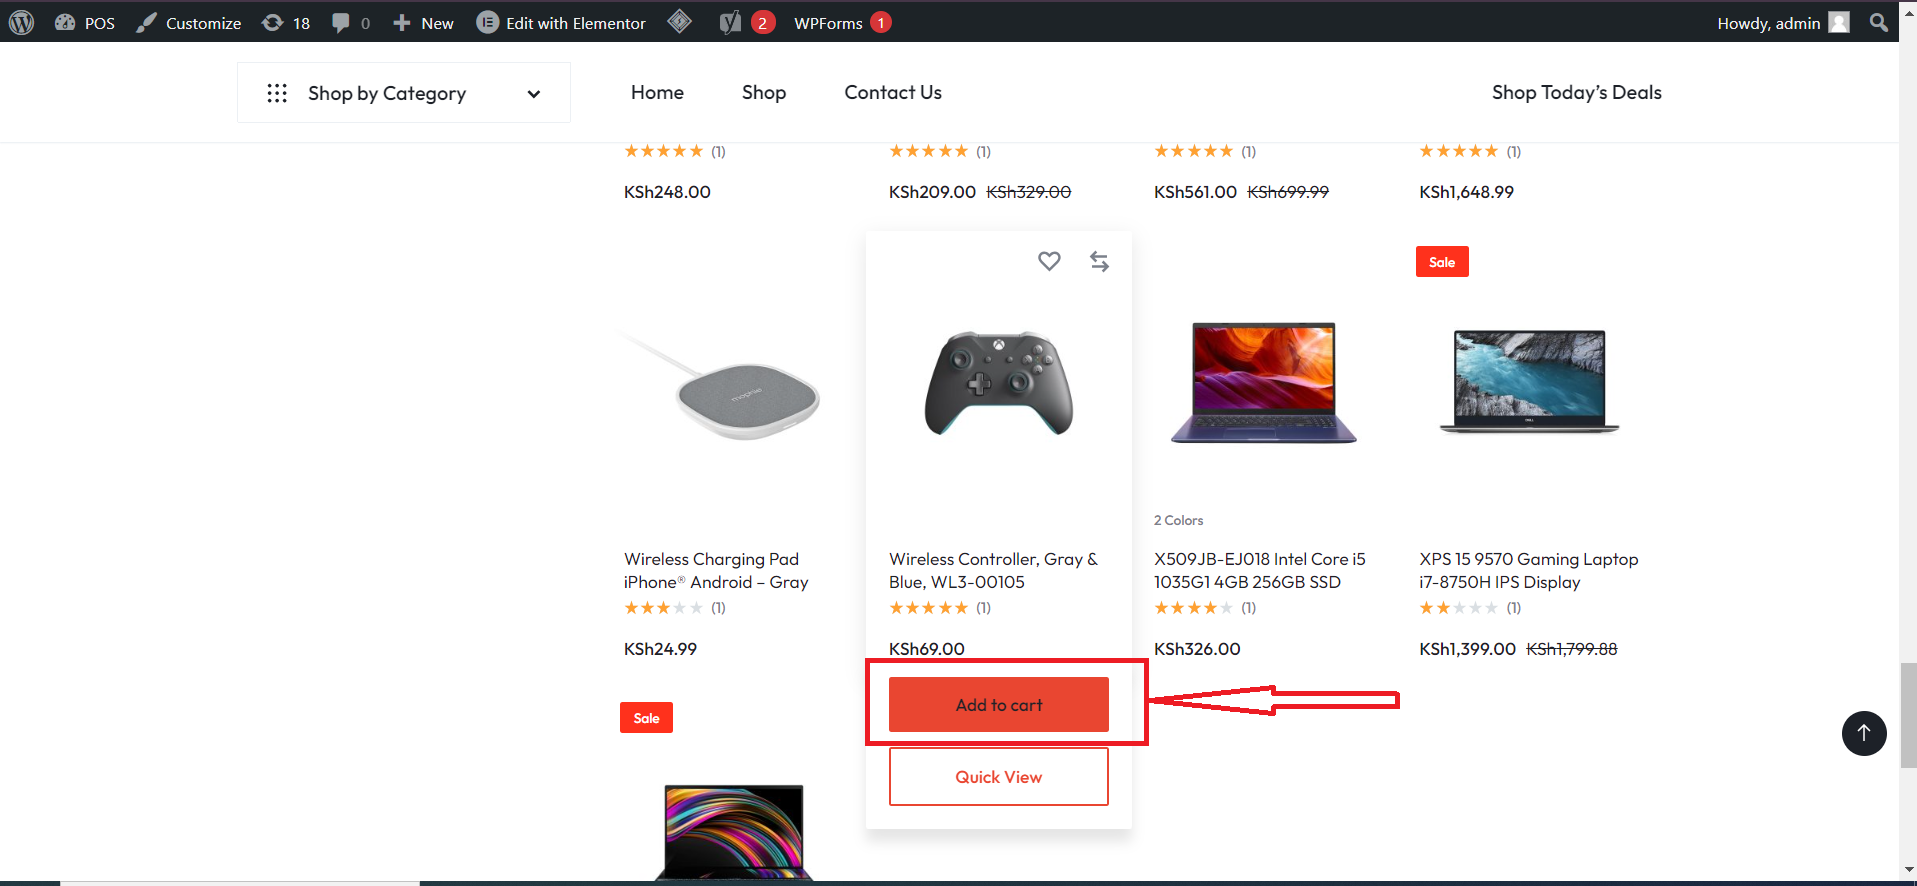
After viewing your intended product, you can either add to cart by clicking the cart icon where your item will be added to the shopping basket, or you could do a quick view of the product for more details and explore more options of the products.
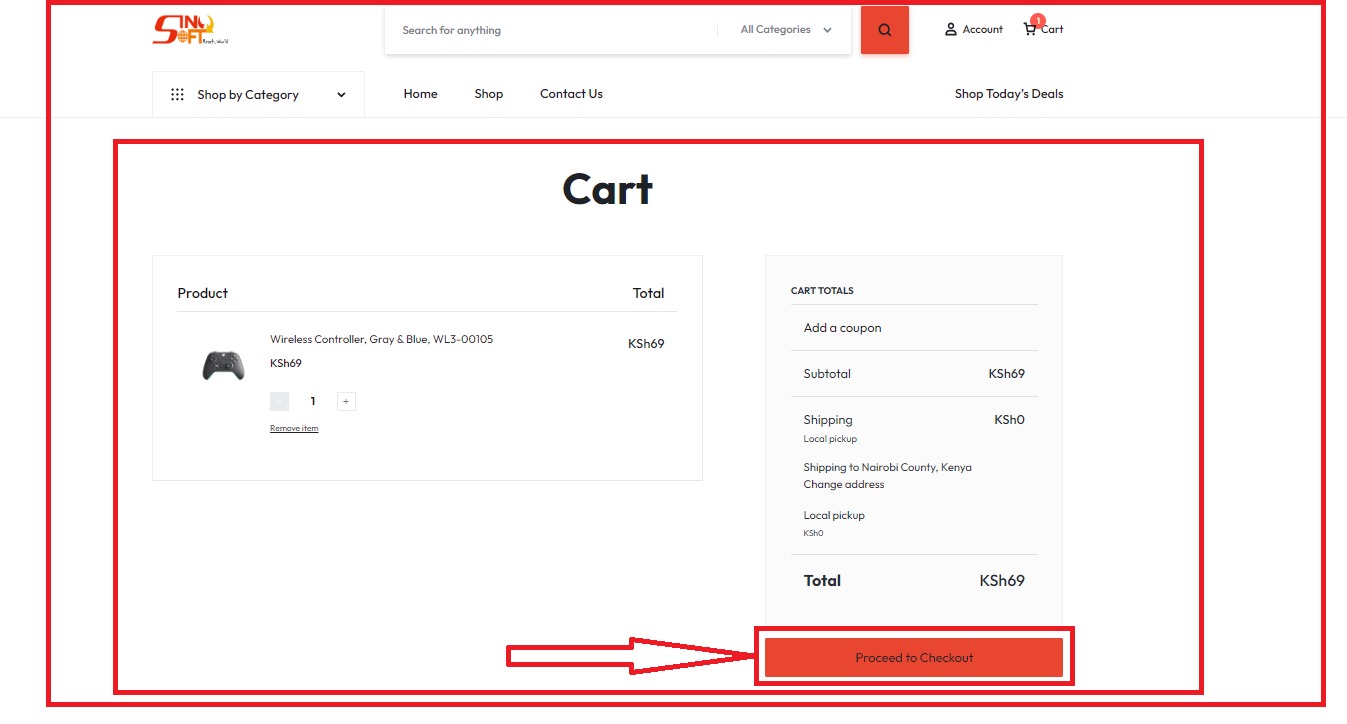
After adding product to Cart, here is how your cart will appear depending on how many products you've added.
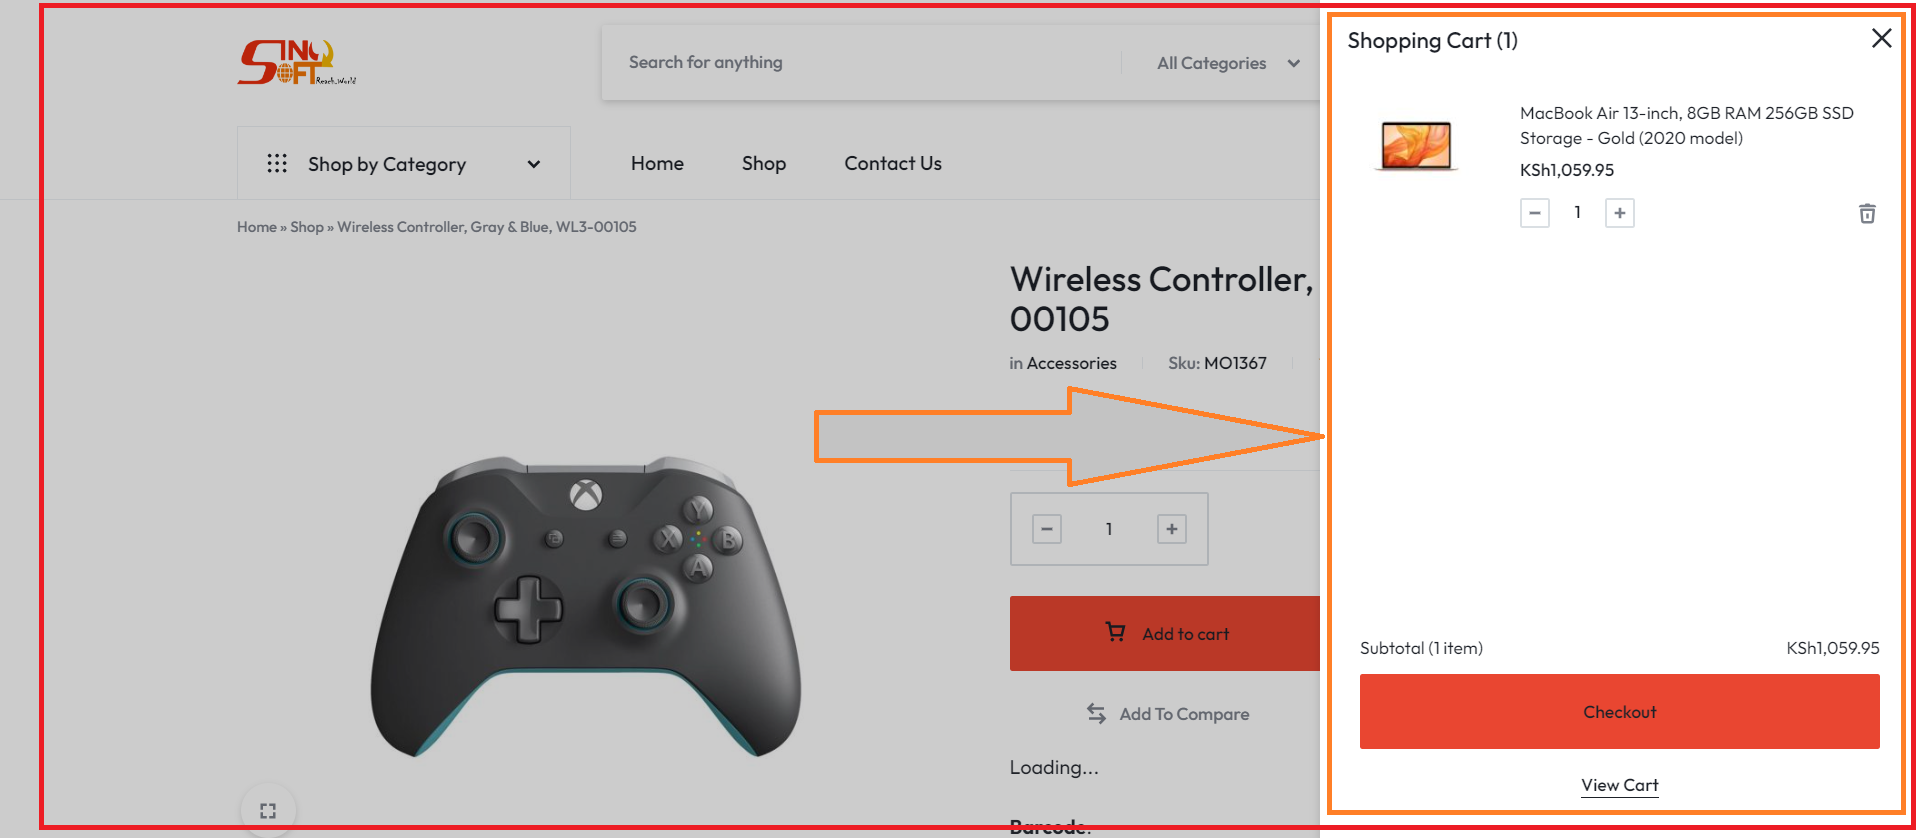
Products added to Cart can be checked out as below....
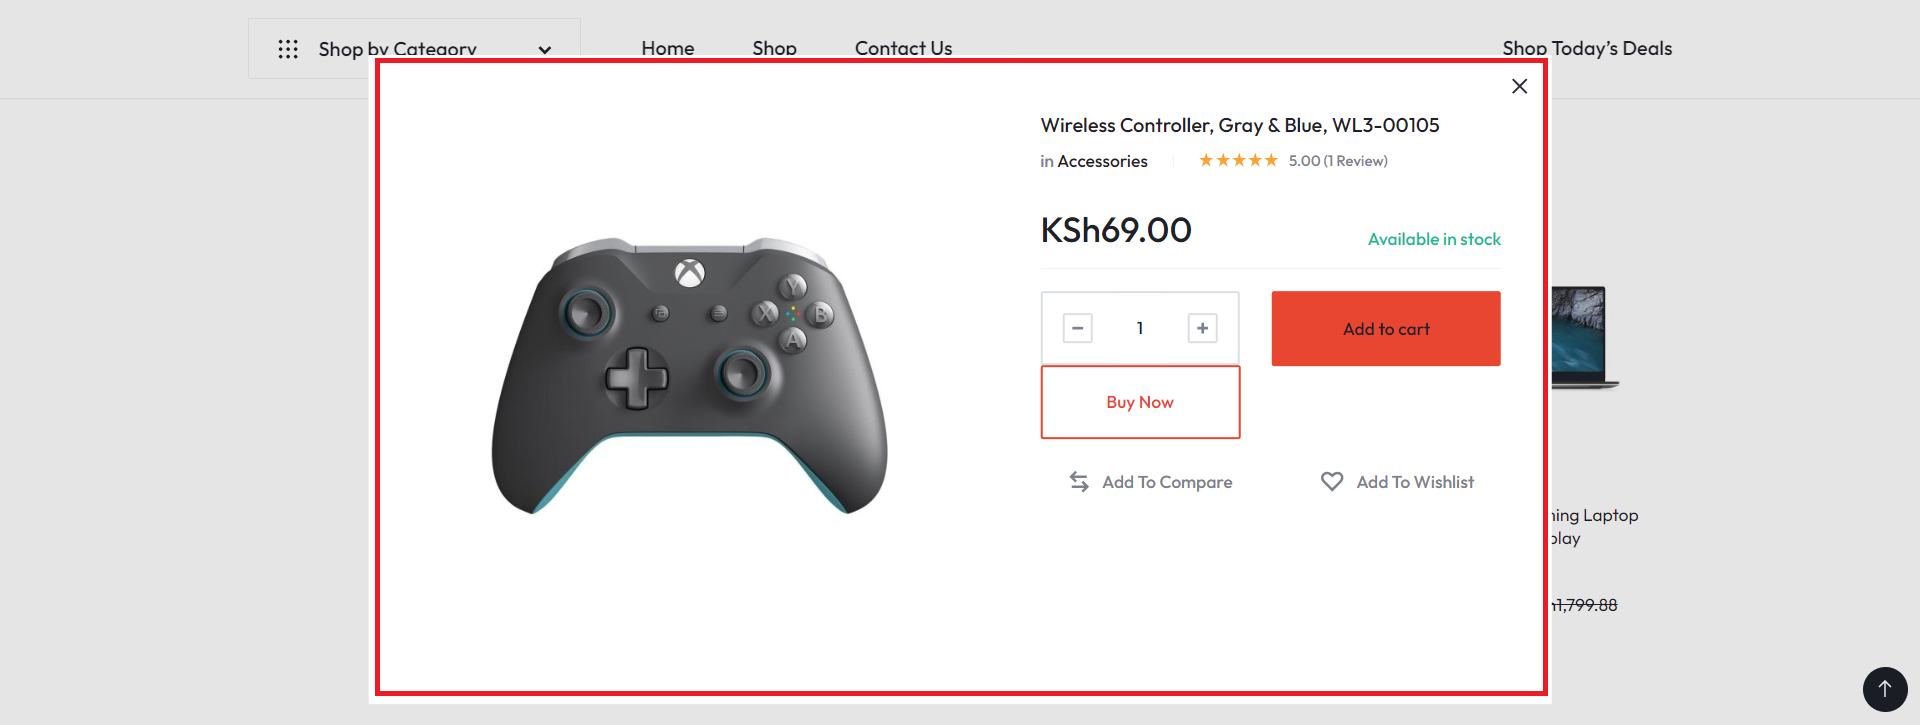
To quick view the product click on the "Quick View" button. Where you will be directed to a page with more information about the product.
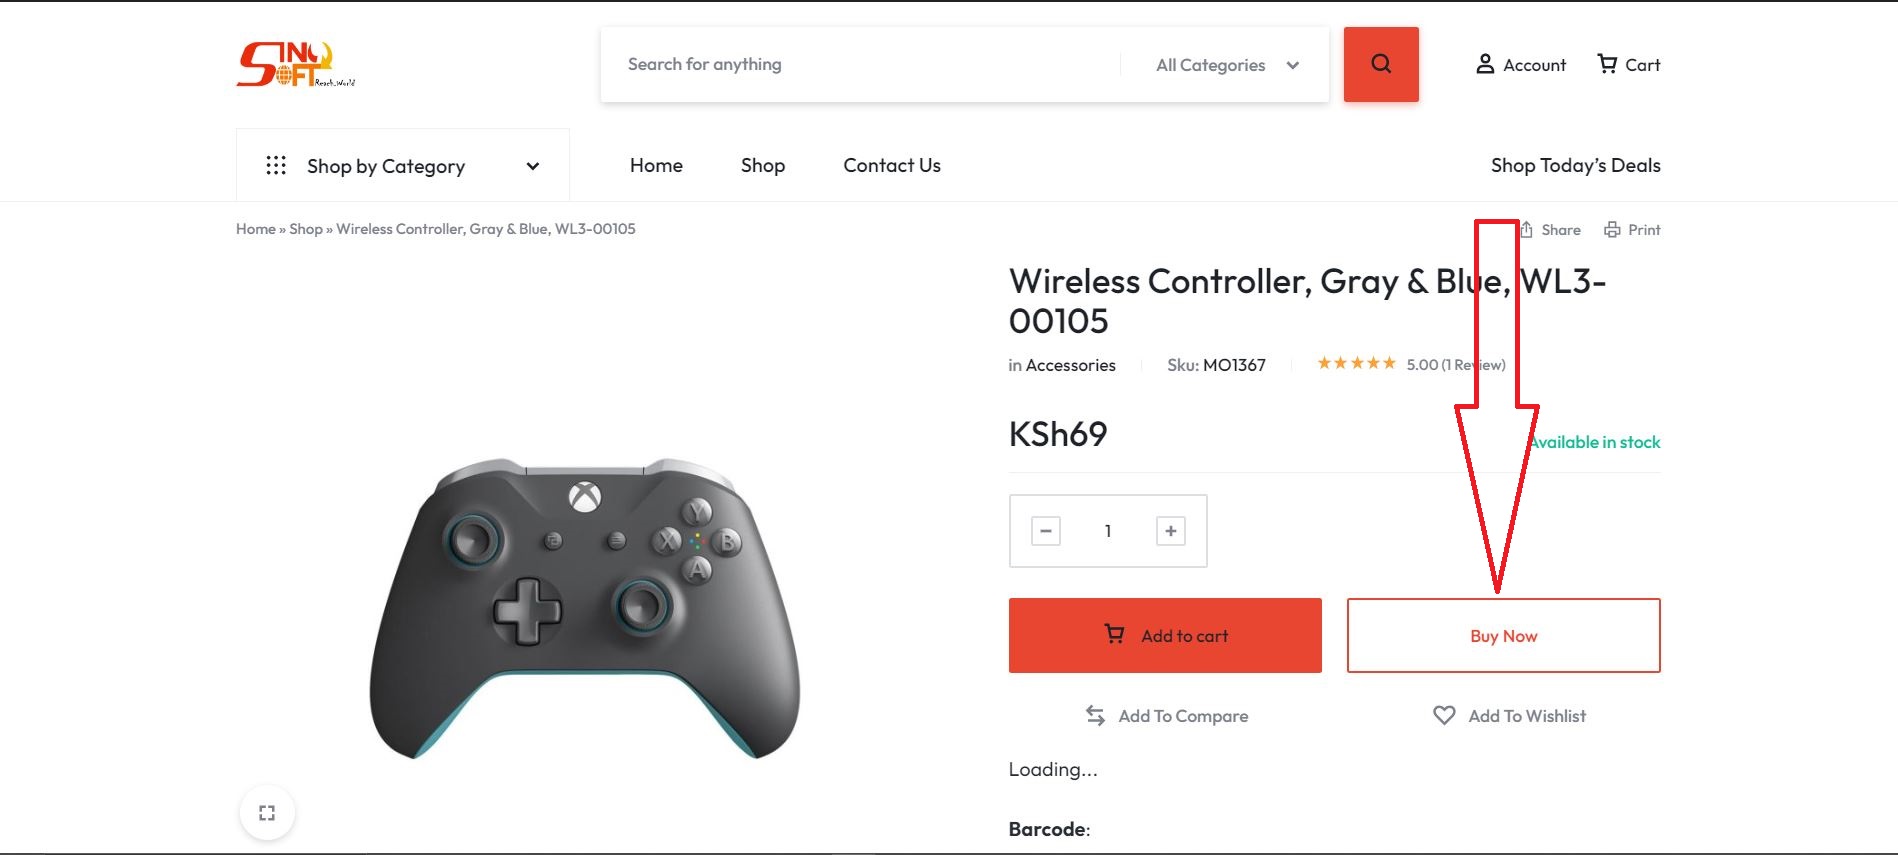
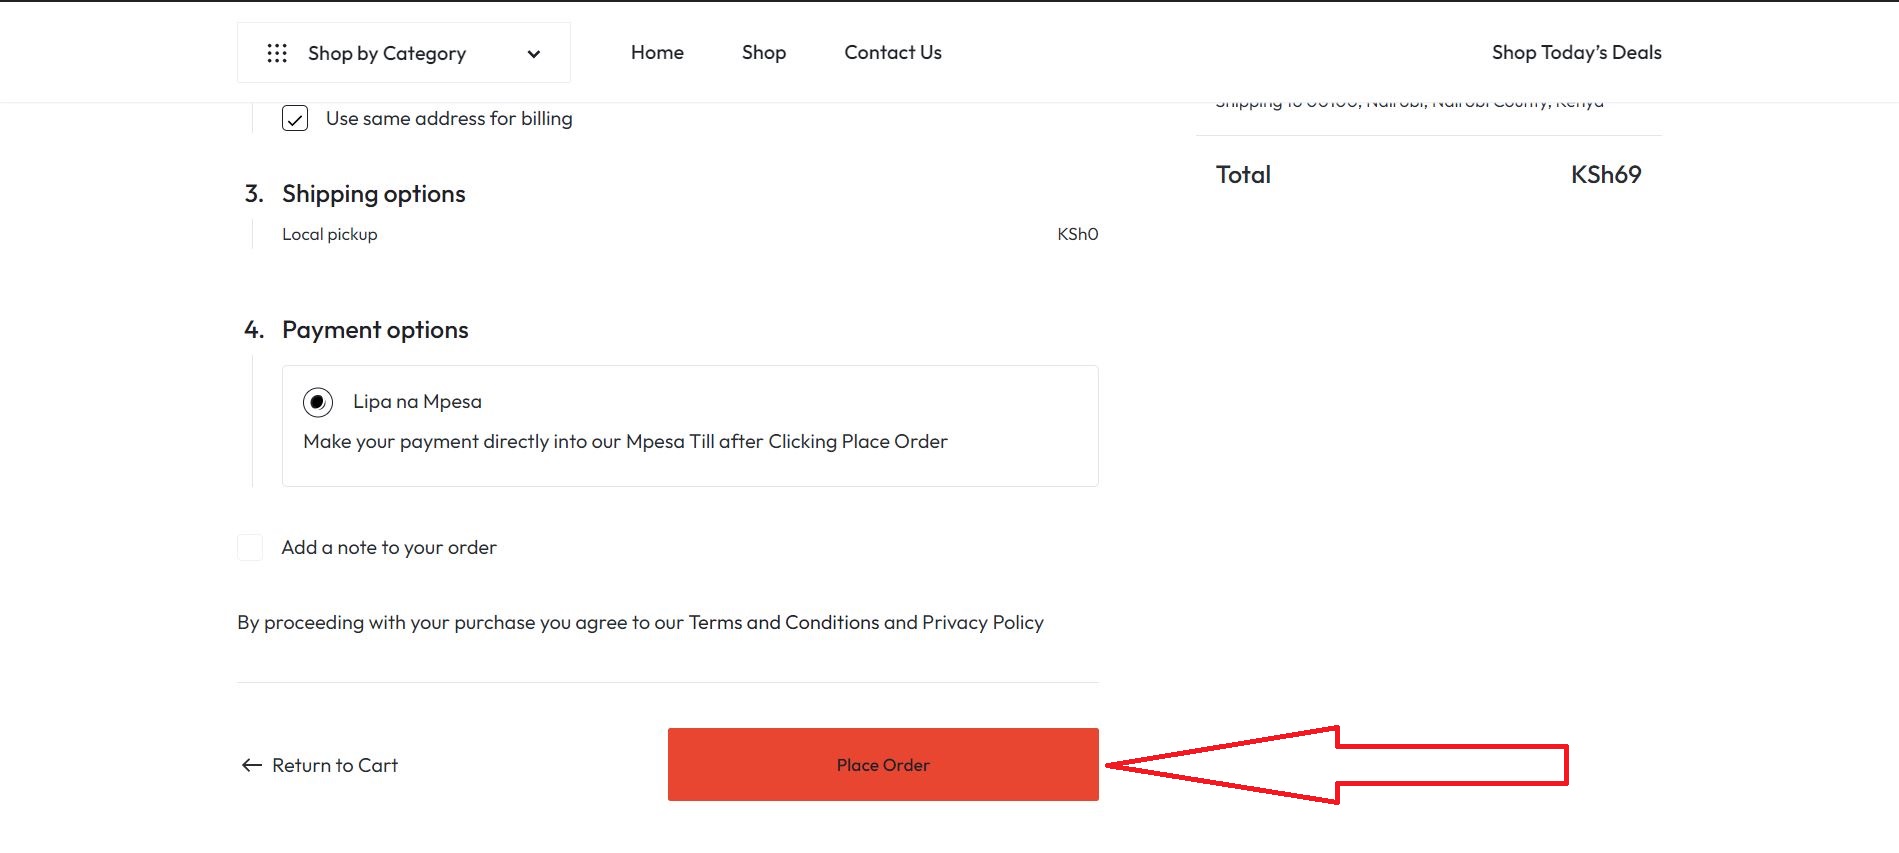
If you want to purchase a product instantly, click buy now which will lead you to the
‘Check Out” page.
On the check out page, you will be required to fill in your:
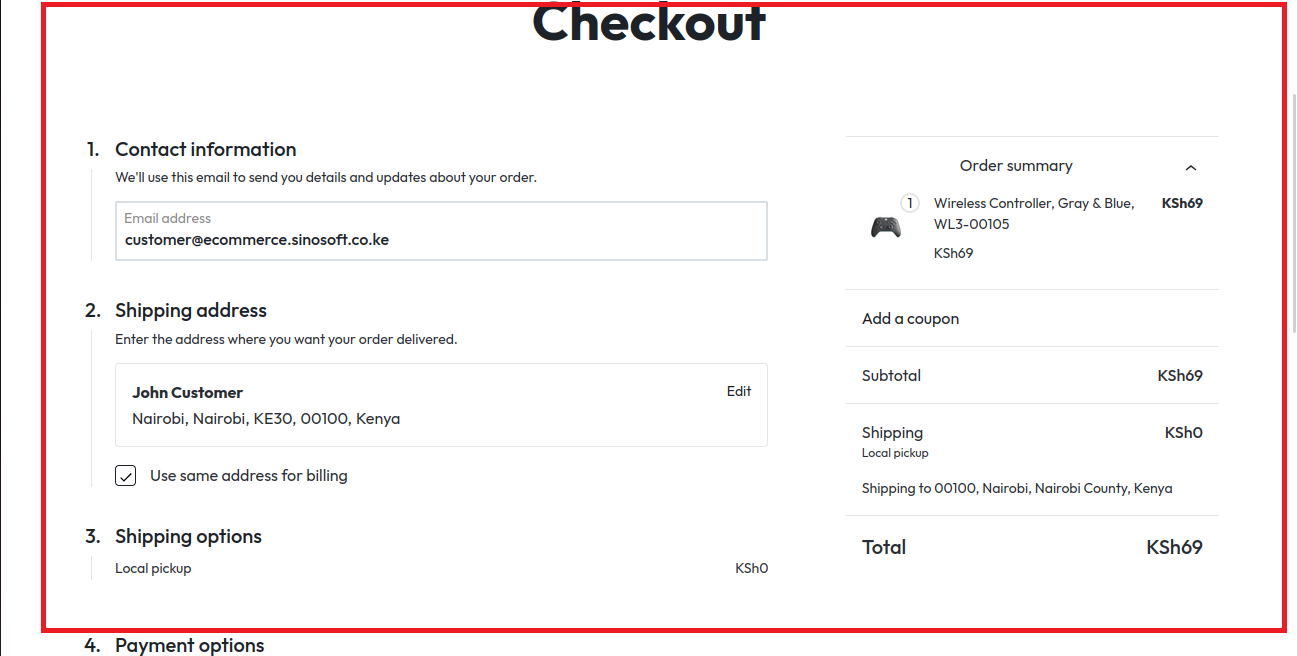
Please note that the name you enter here must be the same as that associated with your M-Pesa number.
To ensure that your order is properly processed, please enter a valid email address and phone number.
If your billing information is the same as your shipping information then leave the box checked and click " “Payment Method" which is already pre-selected.
If your billing information is different from your shipping information then uncheck the box and fill in the billing information. Then click " Payment Method".
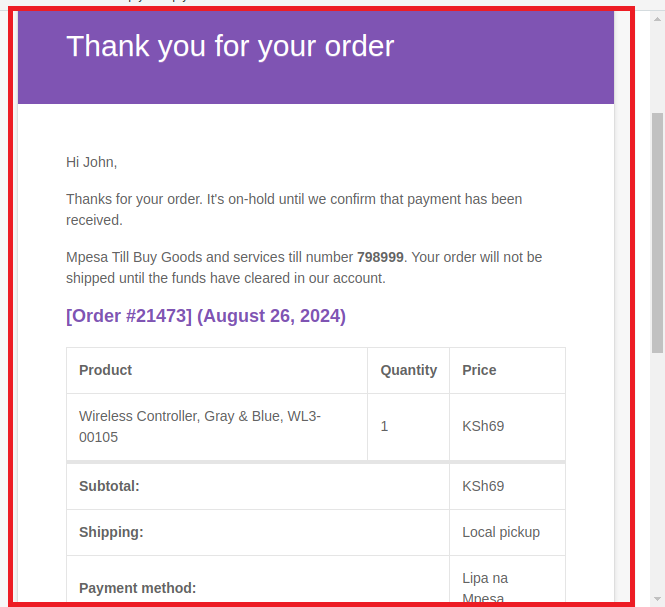
This is a very important step. Your payment has been processed and you just need to check your email to verify that your order has been received. All orders will receive a confirmation email.
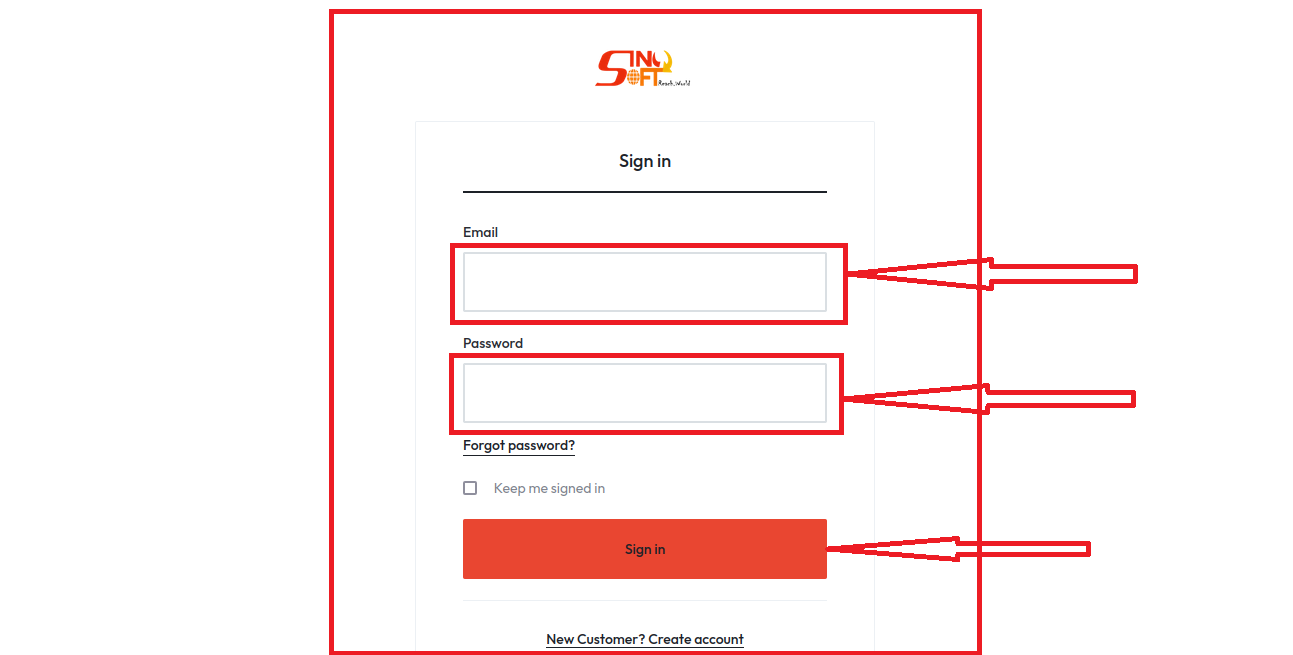
Click on the Account on the Menu
Then click on Sign in option in the panel on the right side menu

Login with email and password given below:
Email: customer@ecommerce.sinosoft.co.ke
Password: customer@123
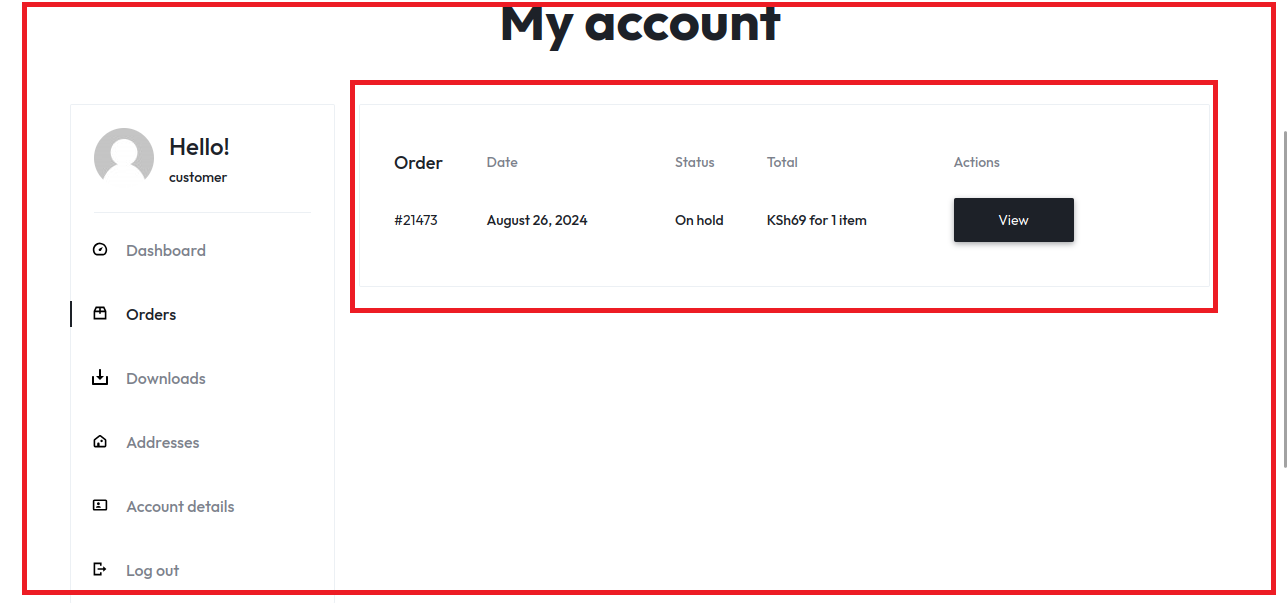
Once you are logged in, you can access all your account details such as dashboard, orders, downloads, addresses, account details as well as how to log out etc. as illustrated below.
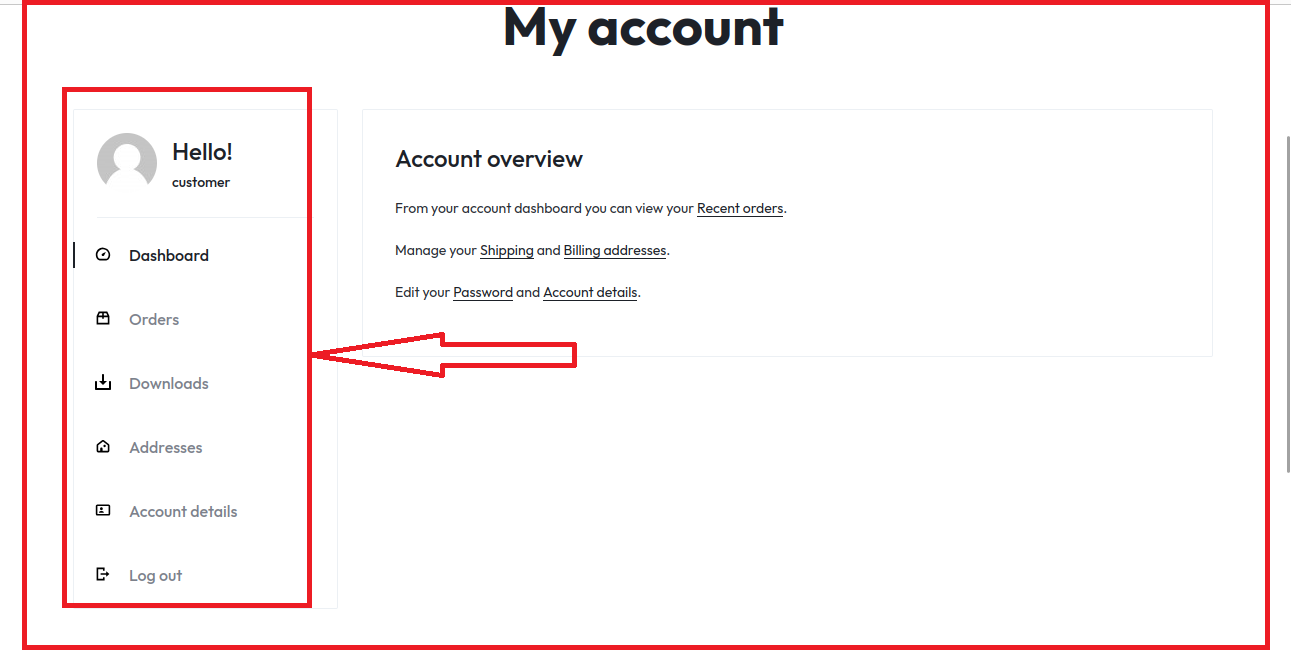
The most crucial part is checking your orders where it shows different orders made as well as their status.
You can also check account details by clicking on account details link.
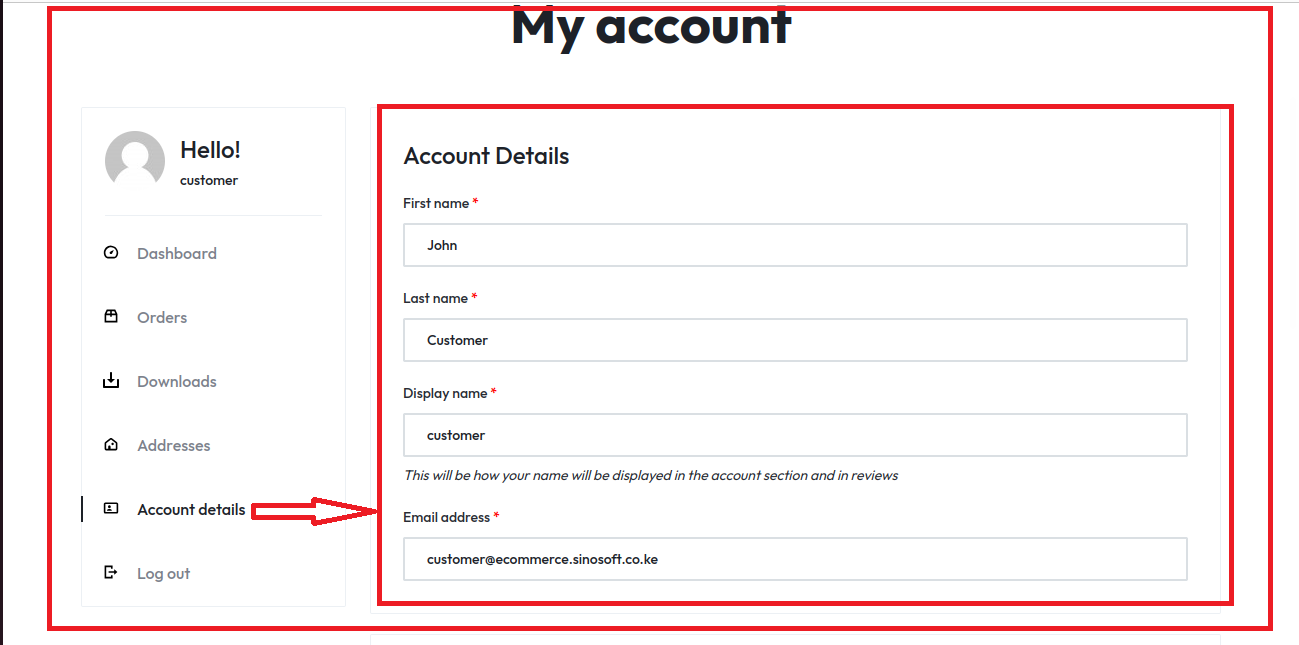
You can as well change your password and click save changes under my account details.

Also read How to Know if your Passport is Ready in Kenya.
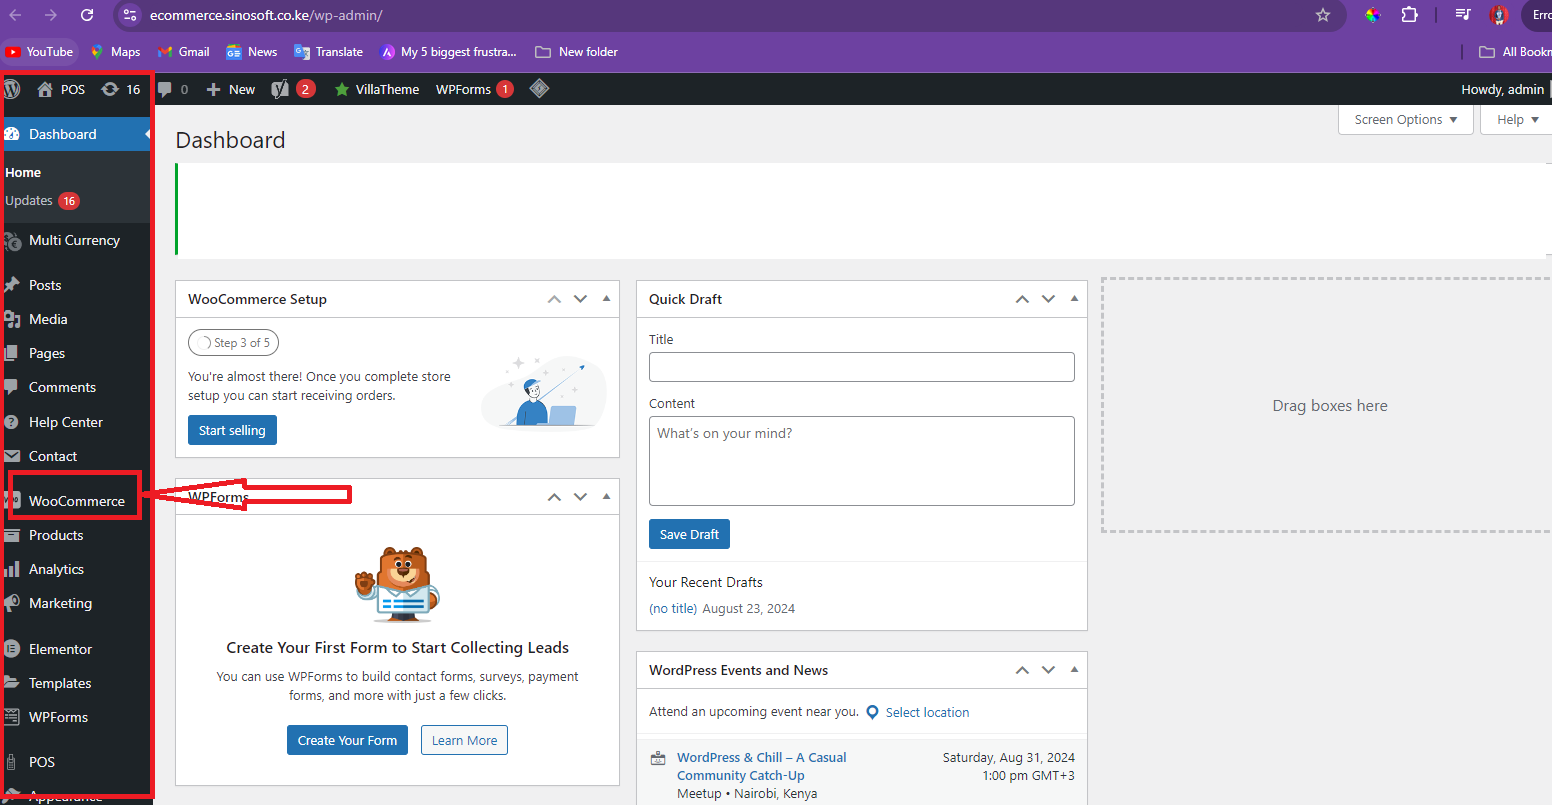
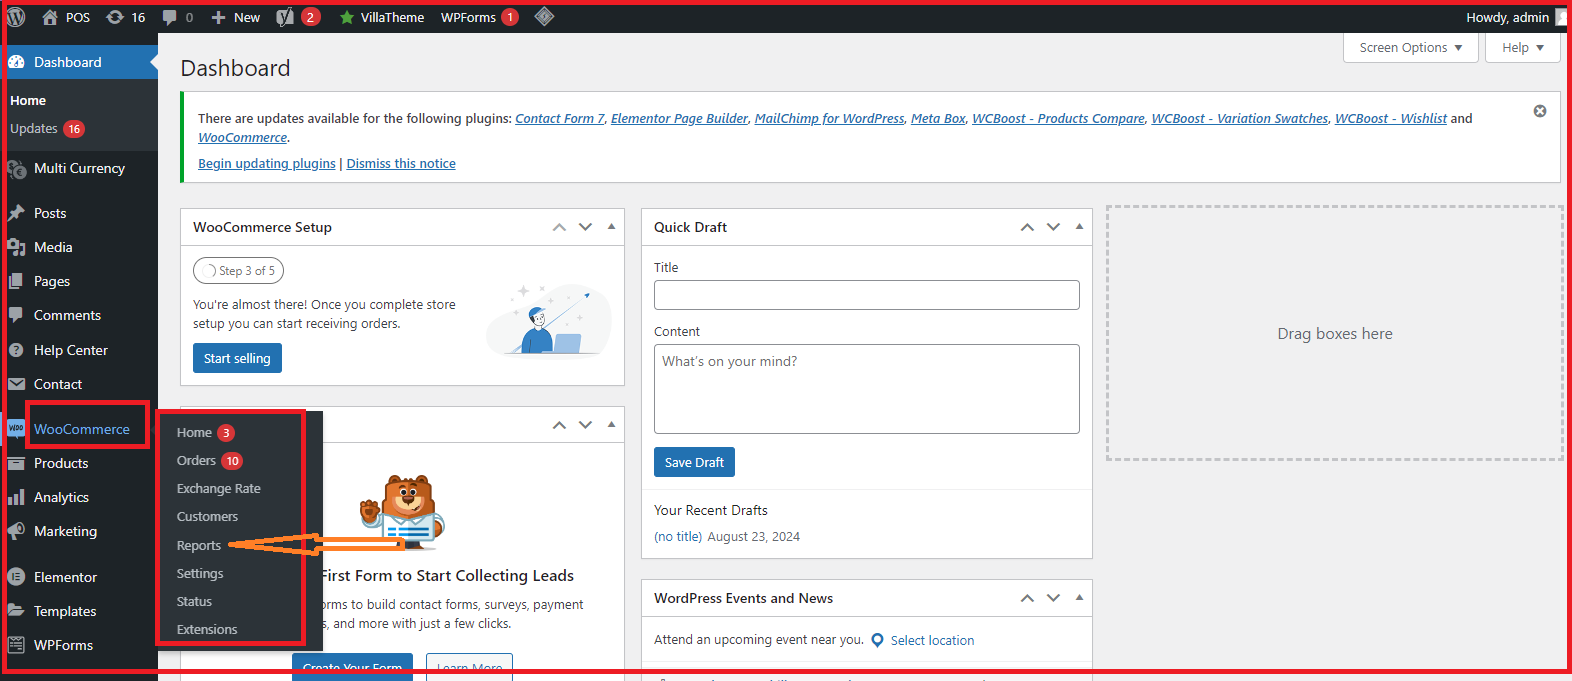
On the dashboard, you will see a list of items. Check for “WooCommerce” and click on it to access it. A side menu will appear, Click on "Orders”.
The final link to access the admin dashboard using this link.
N/B: You must be a shop administrator to access all customers orders.
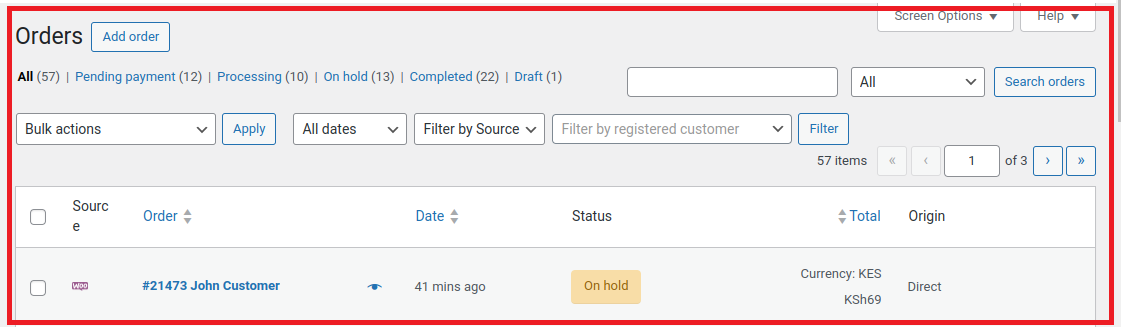
To view the orders received in a particular period of time, click “WooCommerce” again and look for “Orders”. You can view your orders in whatever period of time you so desire.
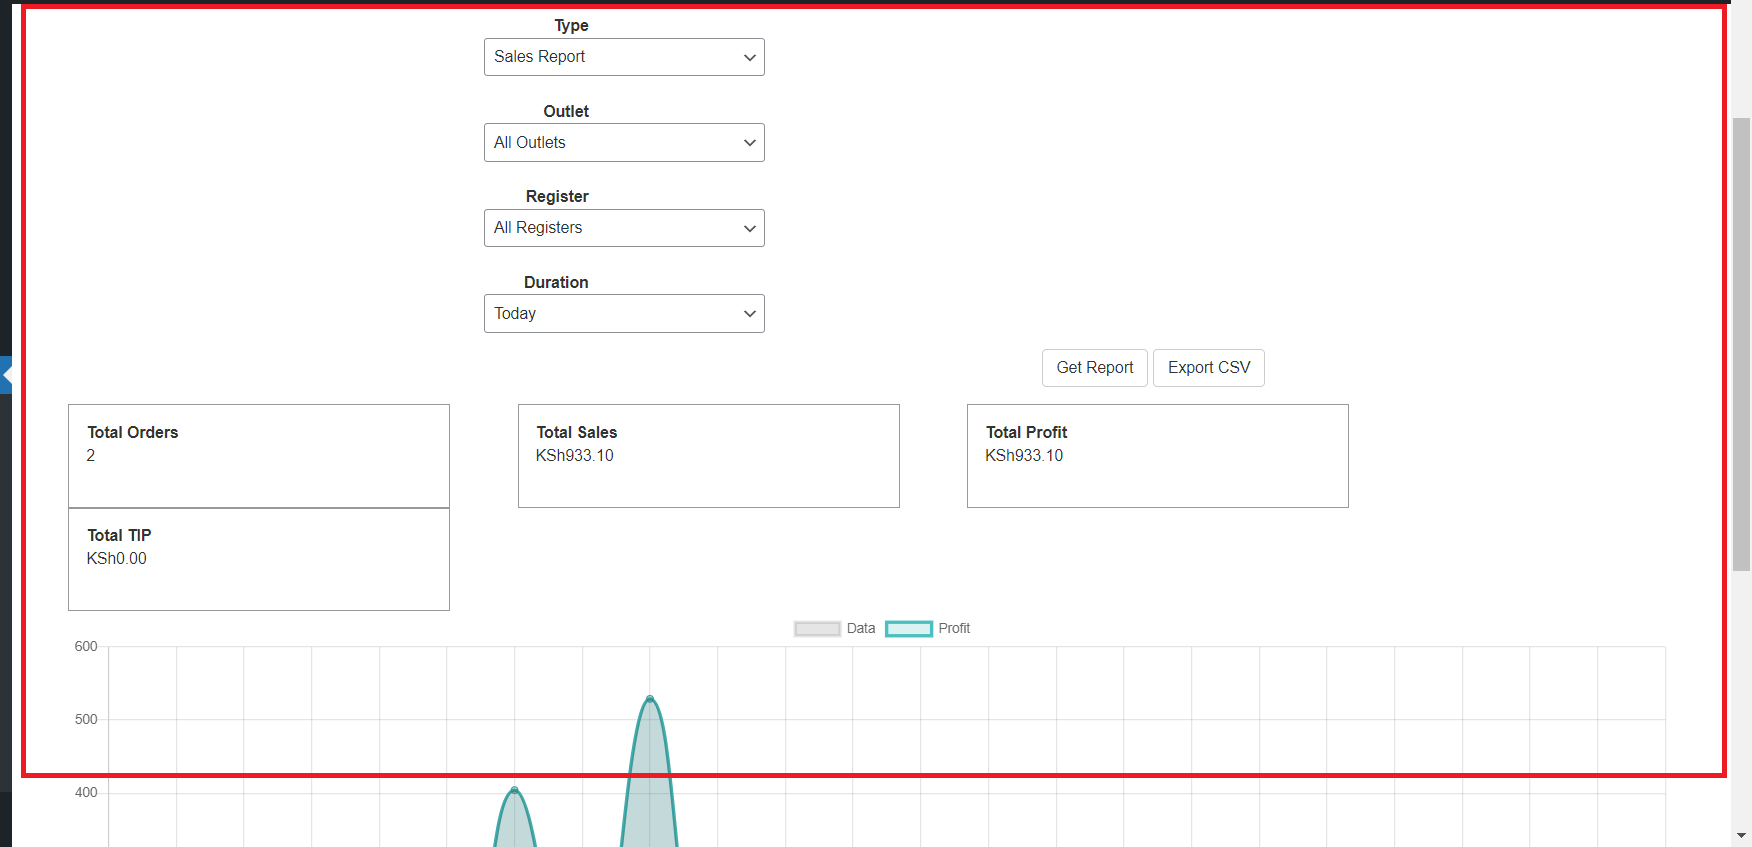
To view the reports on orders received in a particular period of time, click “WooCommerce” again and look for “Reports”. You can view your reports in whatever period of time you so desire.
A POS or point of sale, is a system that enables merchants to process payments and log transactions.
In short, it is essentially a computer-based cash register
Basically, a POS system works in the following ways:
Our POS system is capable of:
To access POS, you will need to be already logged in on WordPress or you can access it directly from this link.
If you are on WordPress Admin Dashboard;
1. Hover on the POS sign.
On the WordPress Dashboard Top Left Menu hover on the POS icon.
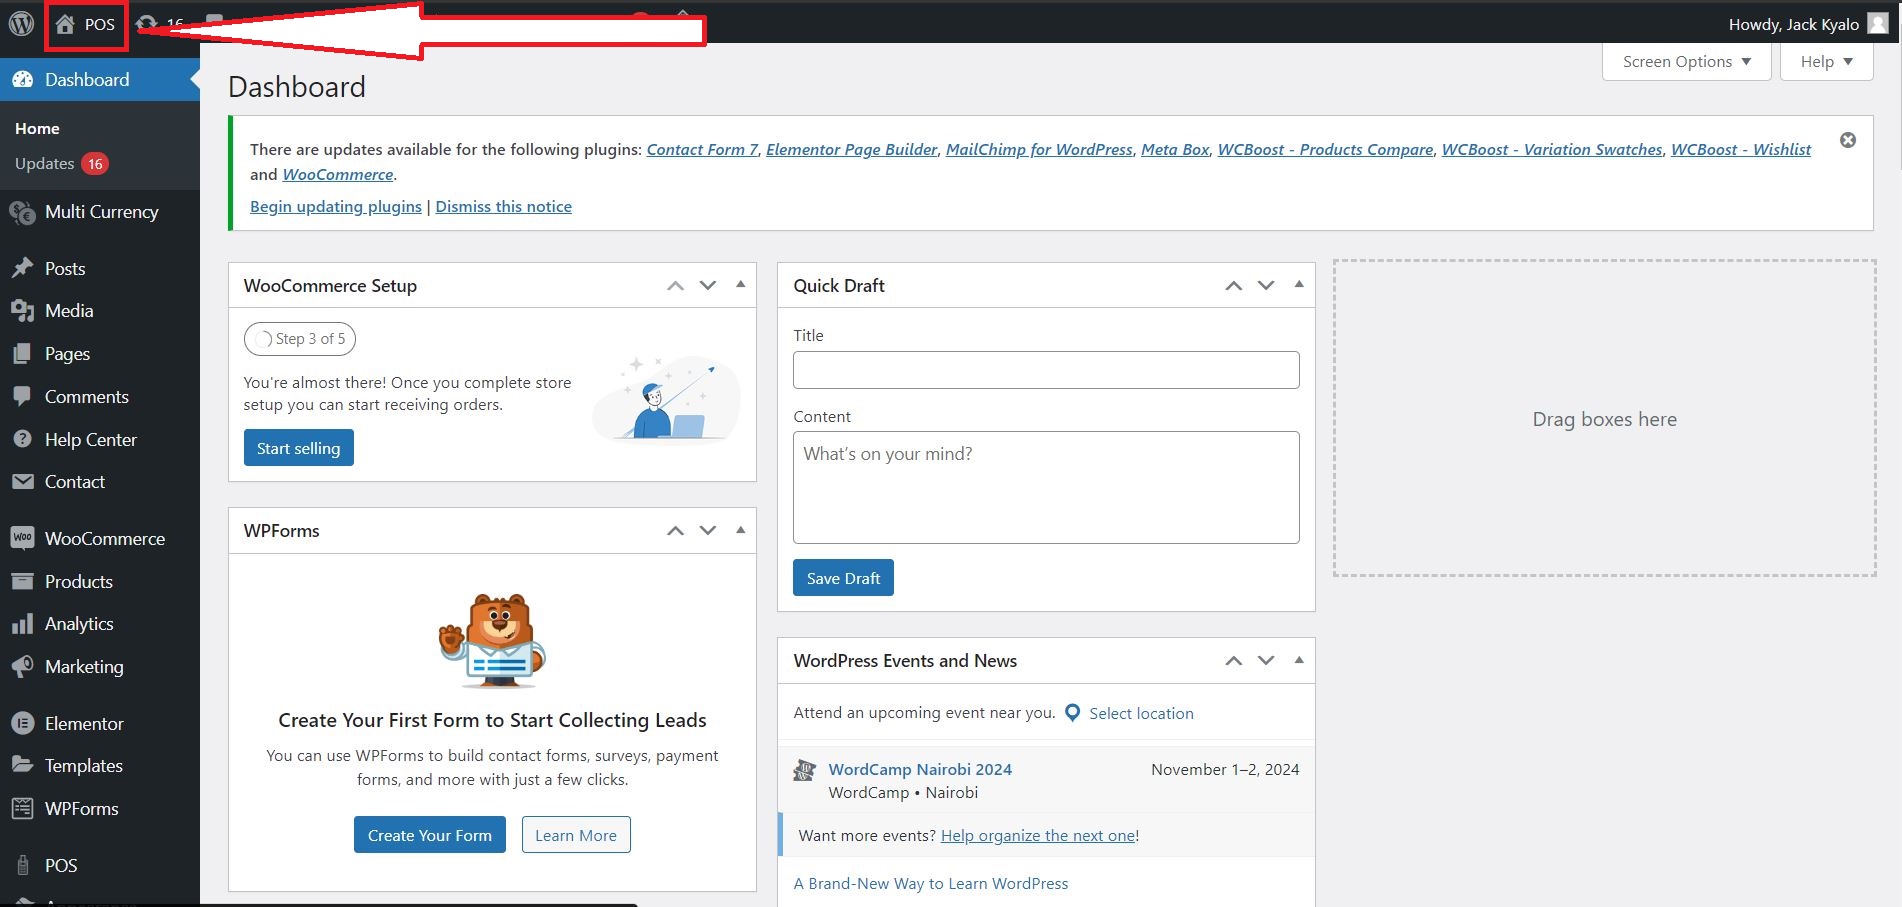
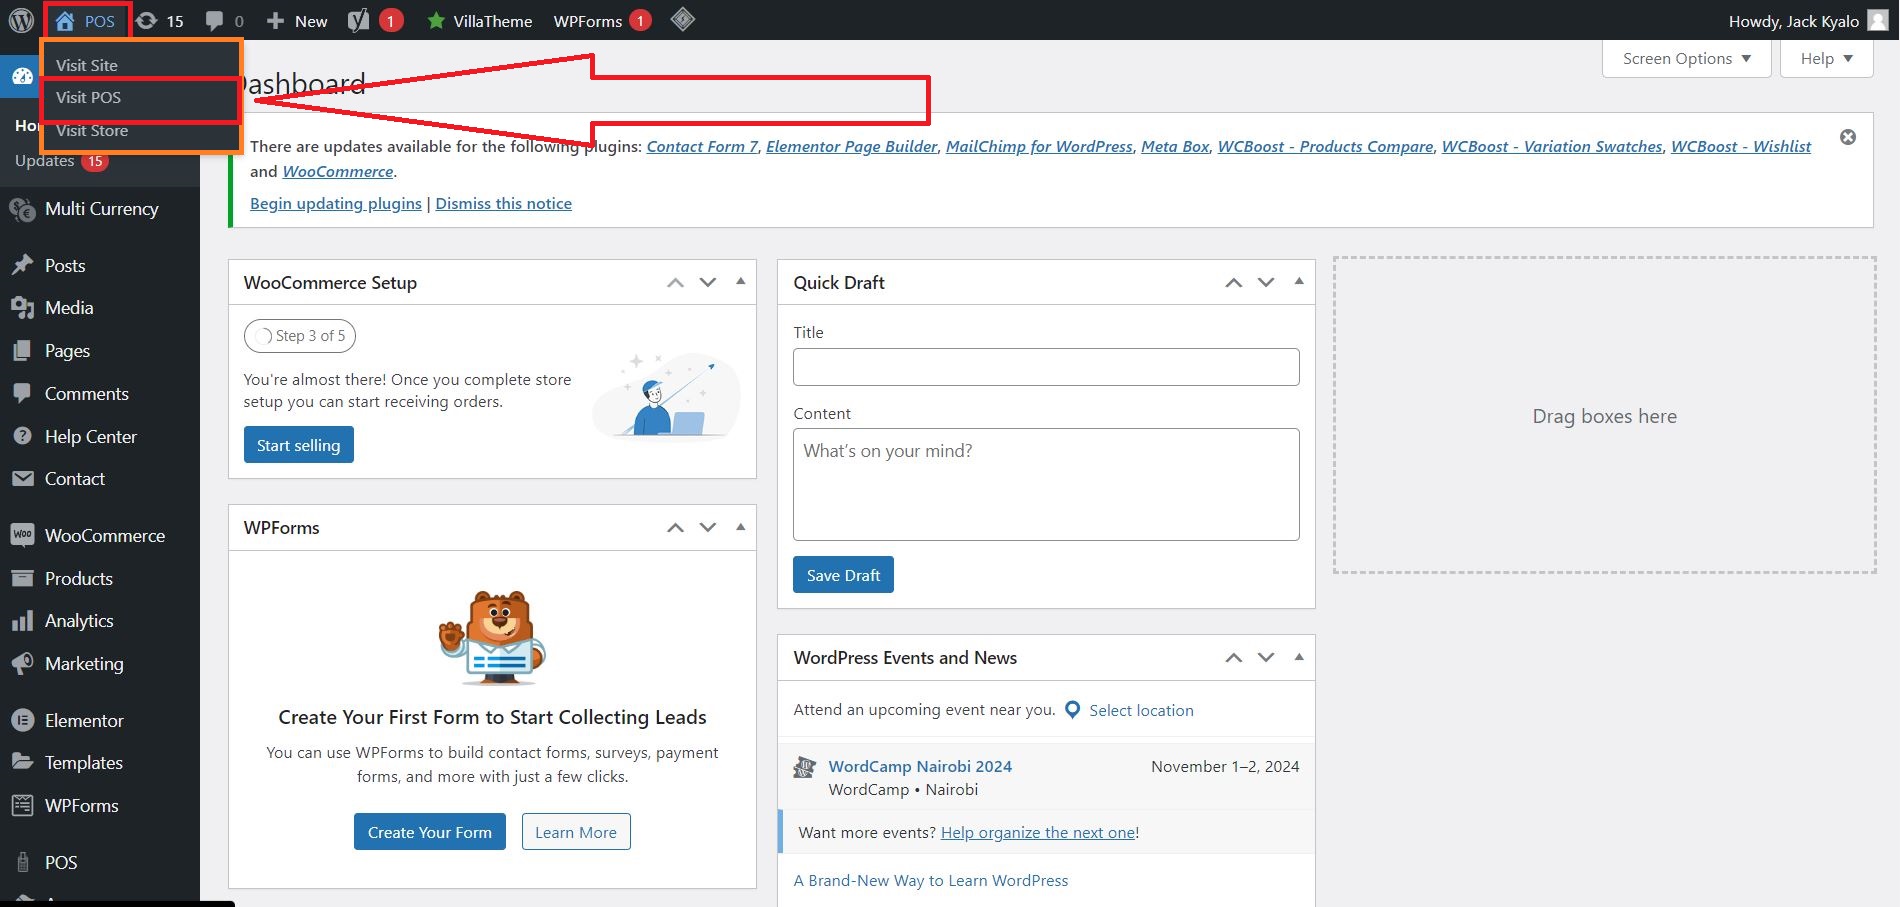
Click on the “Visit POS” to get access to the POS Page.
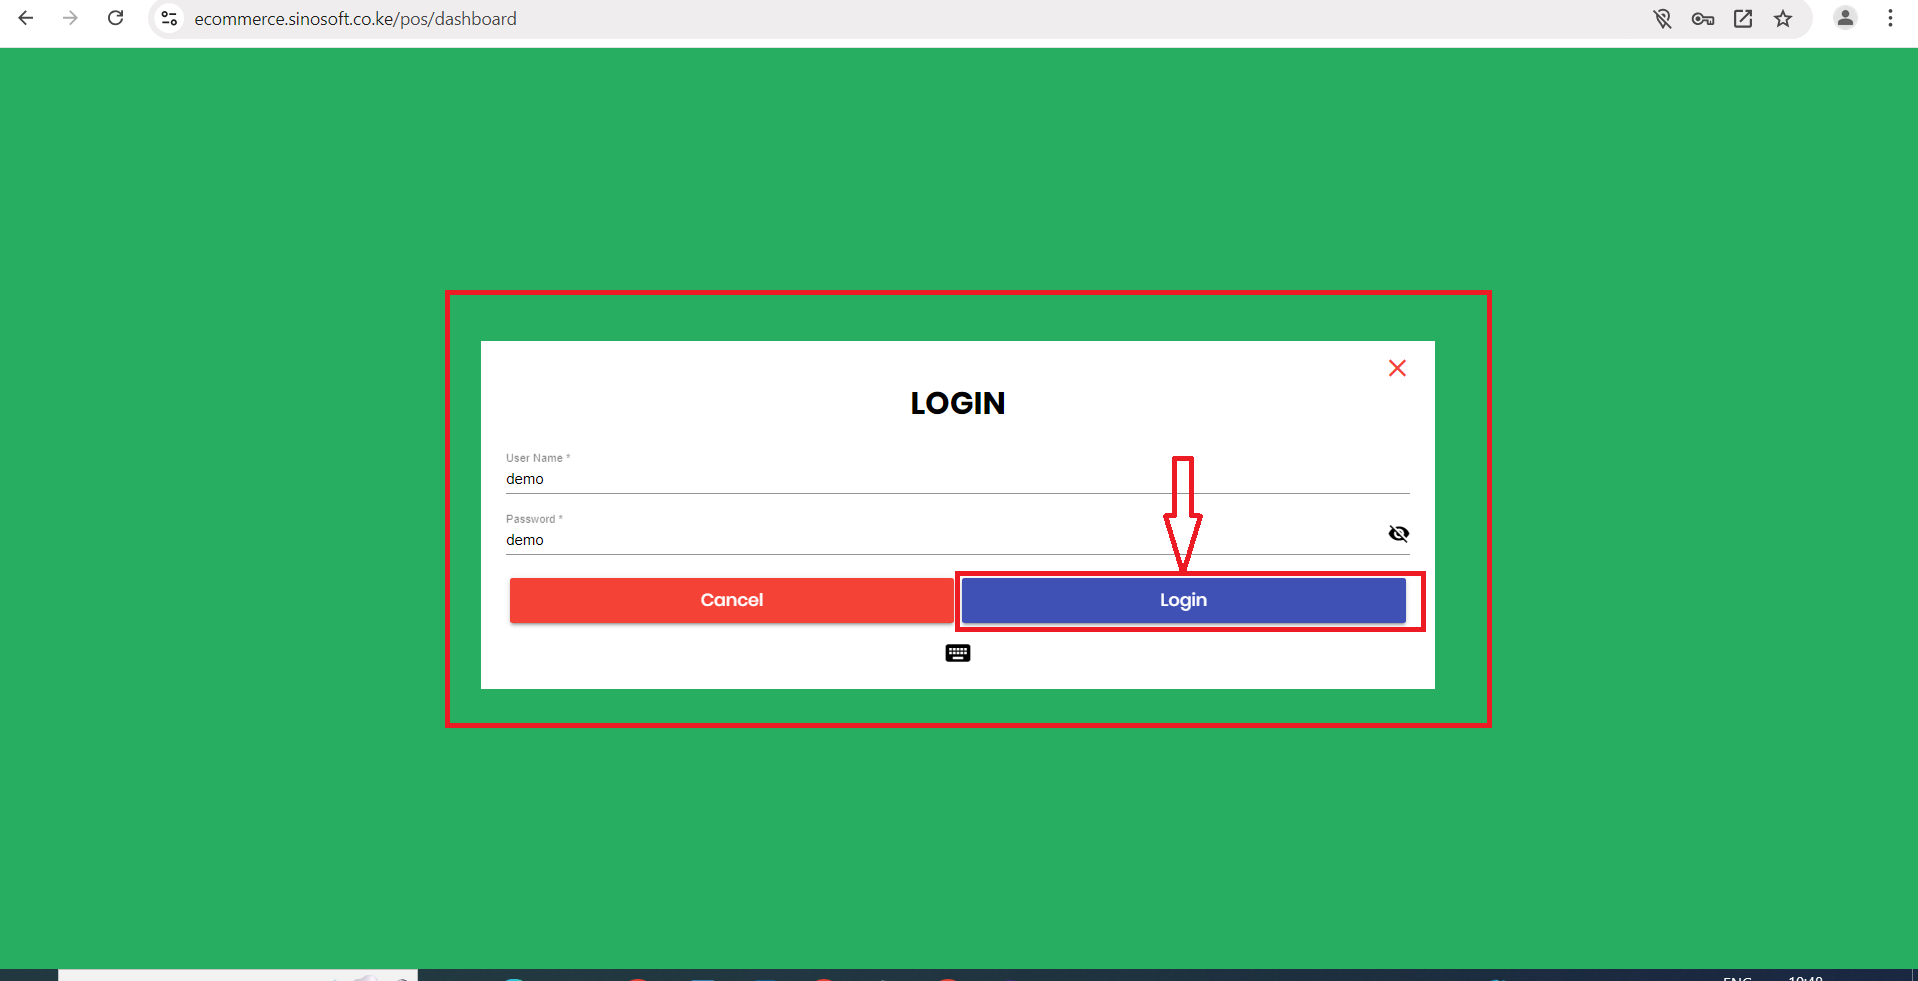
After clicking the view POS button, you will be redirected to a log in Page.
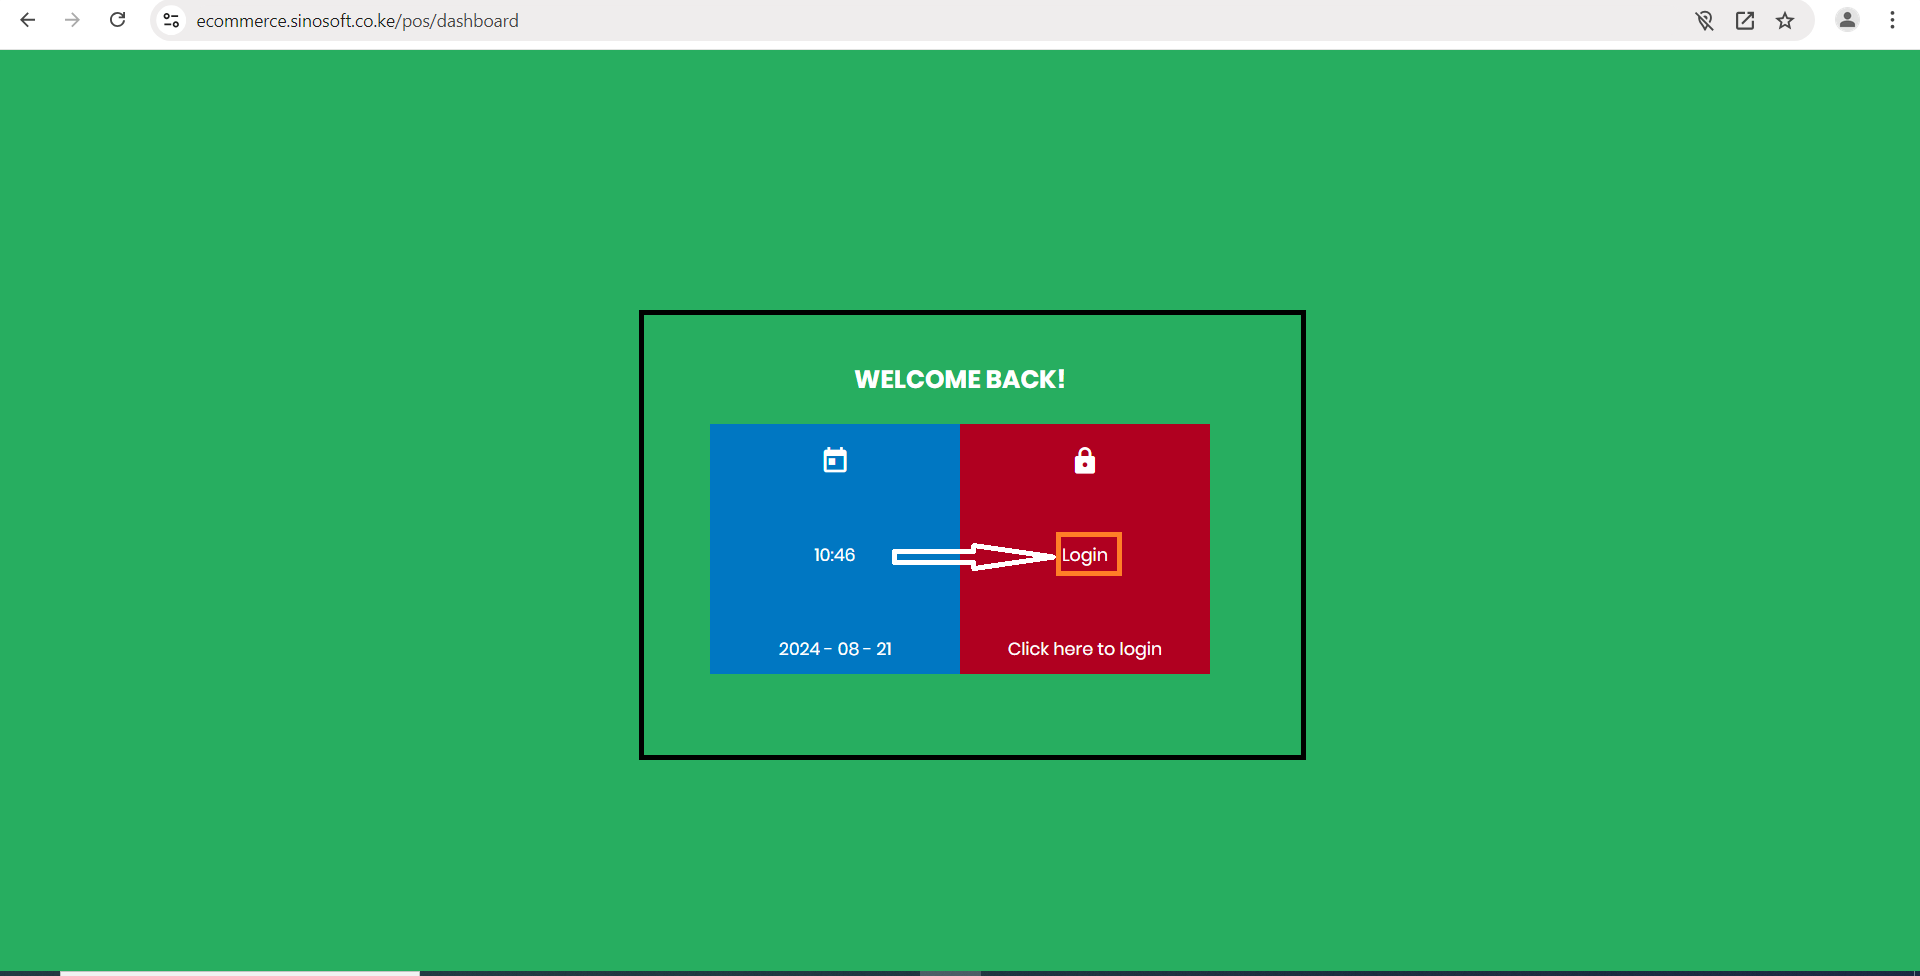
On the redirected page, you will be required to fill in your email address and password. Make sure that the email and password is correct as follows:
Username: demo
Password: demo
PS: You must have a WordPress account to access the POS.
After successfully logging in to POS, you will see the POS Dashboard.
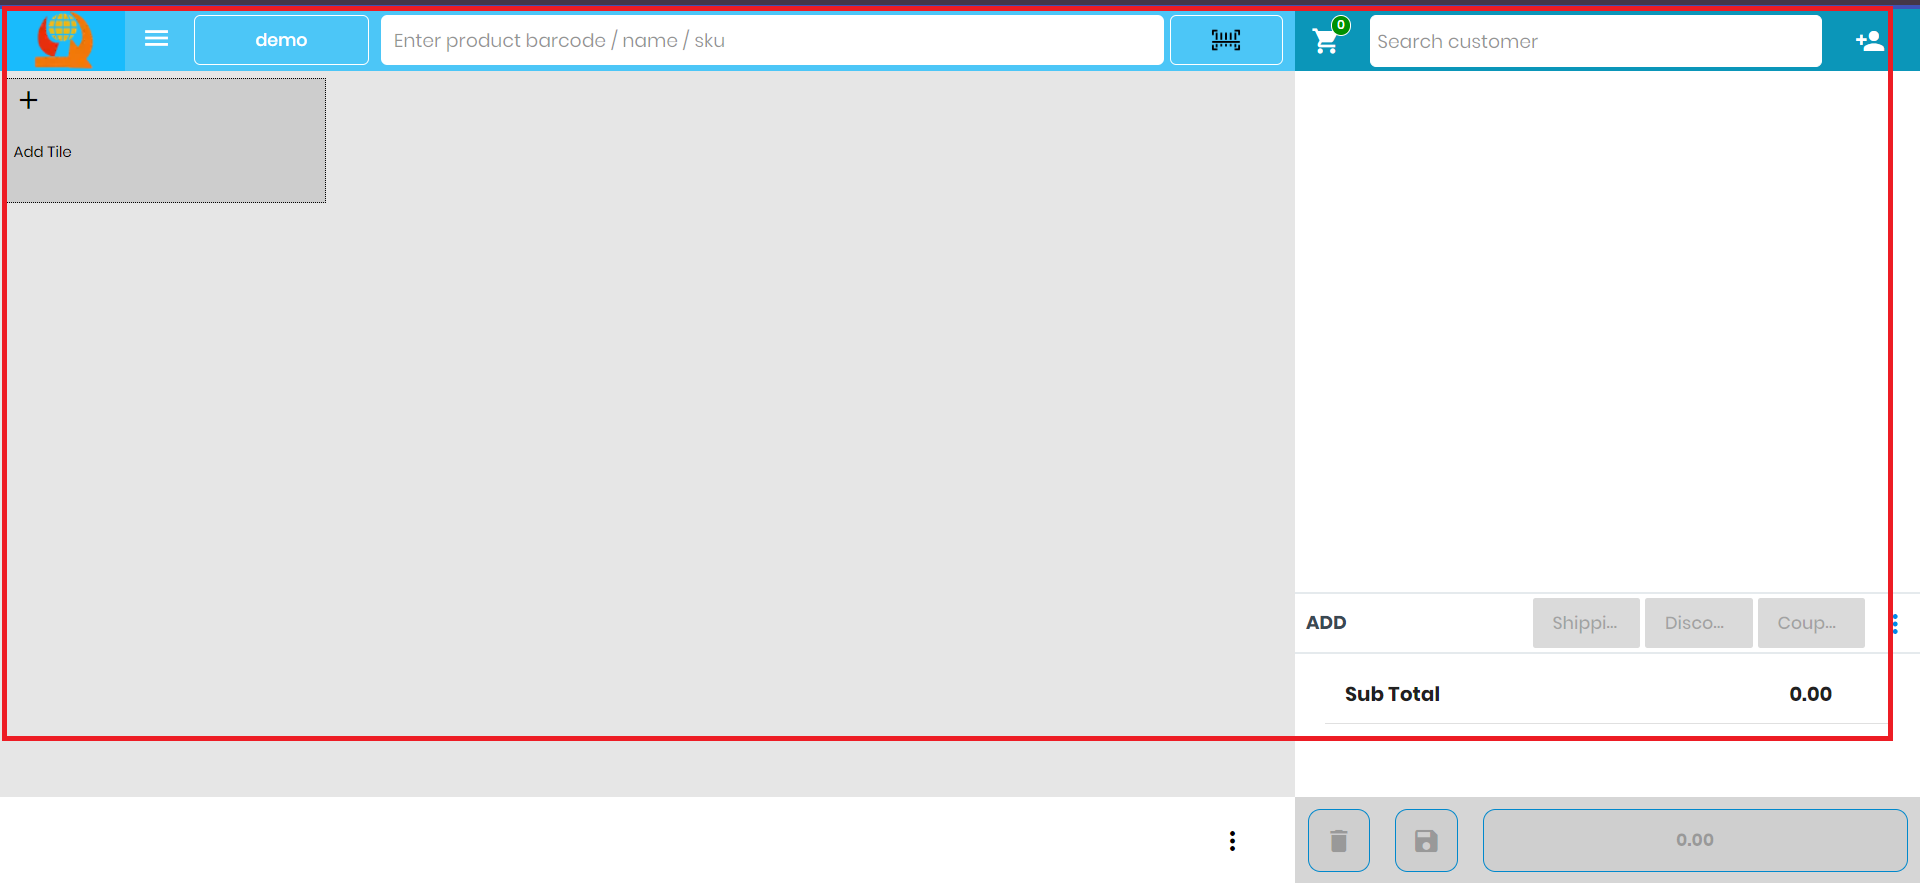
On the dashboard, you can manage orders and make sales.
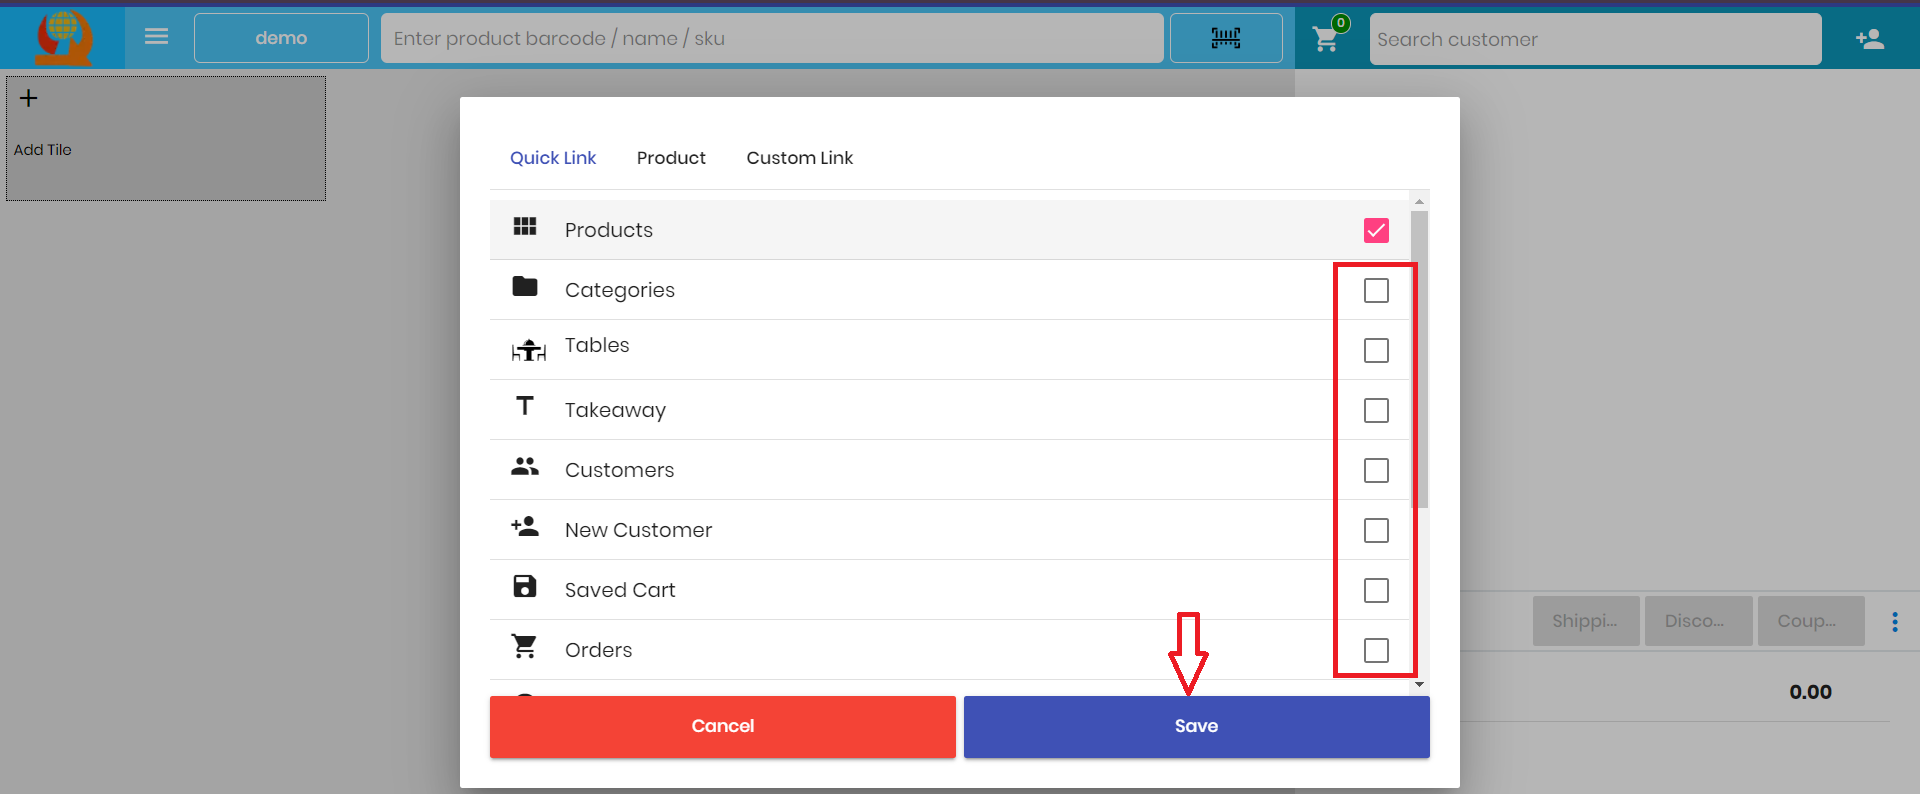
Adding a tile is basically adding relevant Quick links (Categories) that suit your business to the POS dashboard. So to add a tile, click on the “Add tile” then choose the relevant quick link you’d like to add then click on “Save” button.
A tile board is a group of quick links added. After adding a tile from above, they will all appear here and you can click on the tiles added to view them in detail.
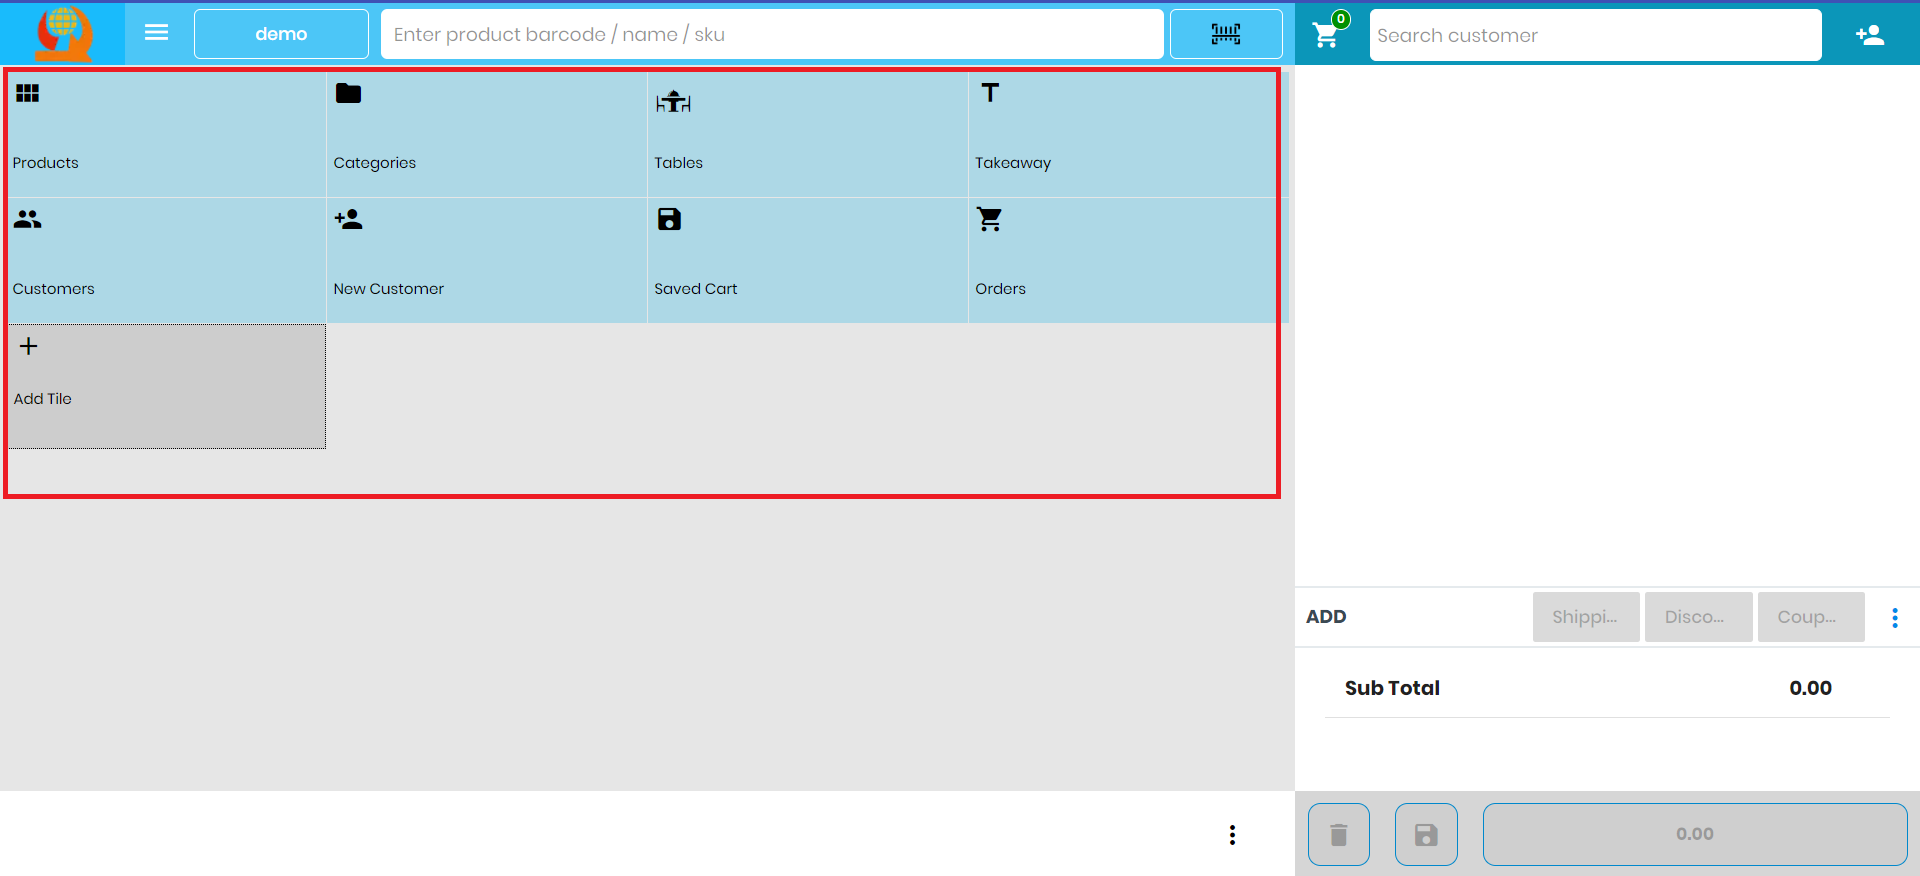
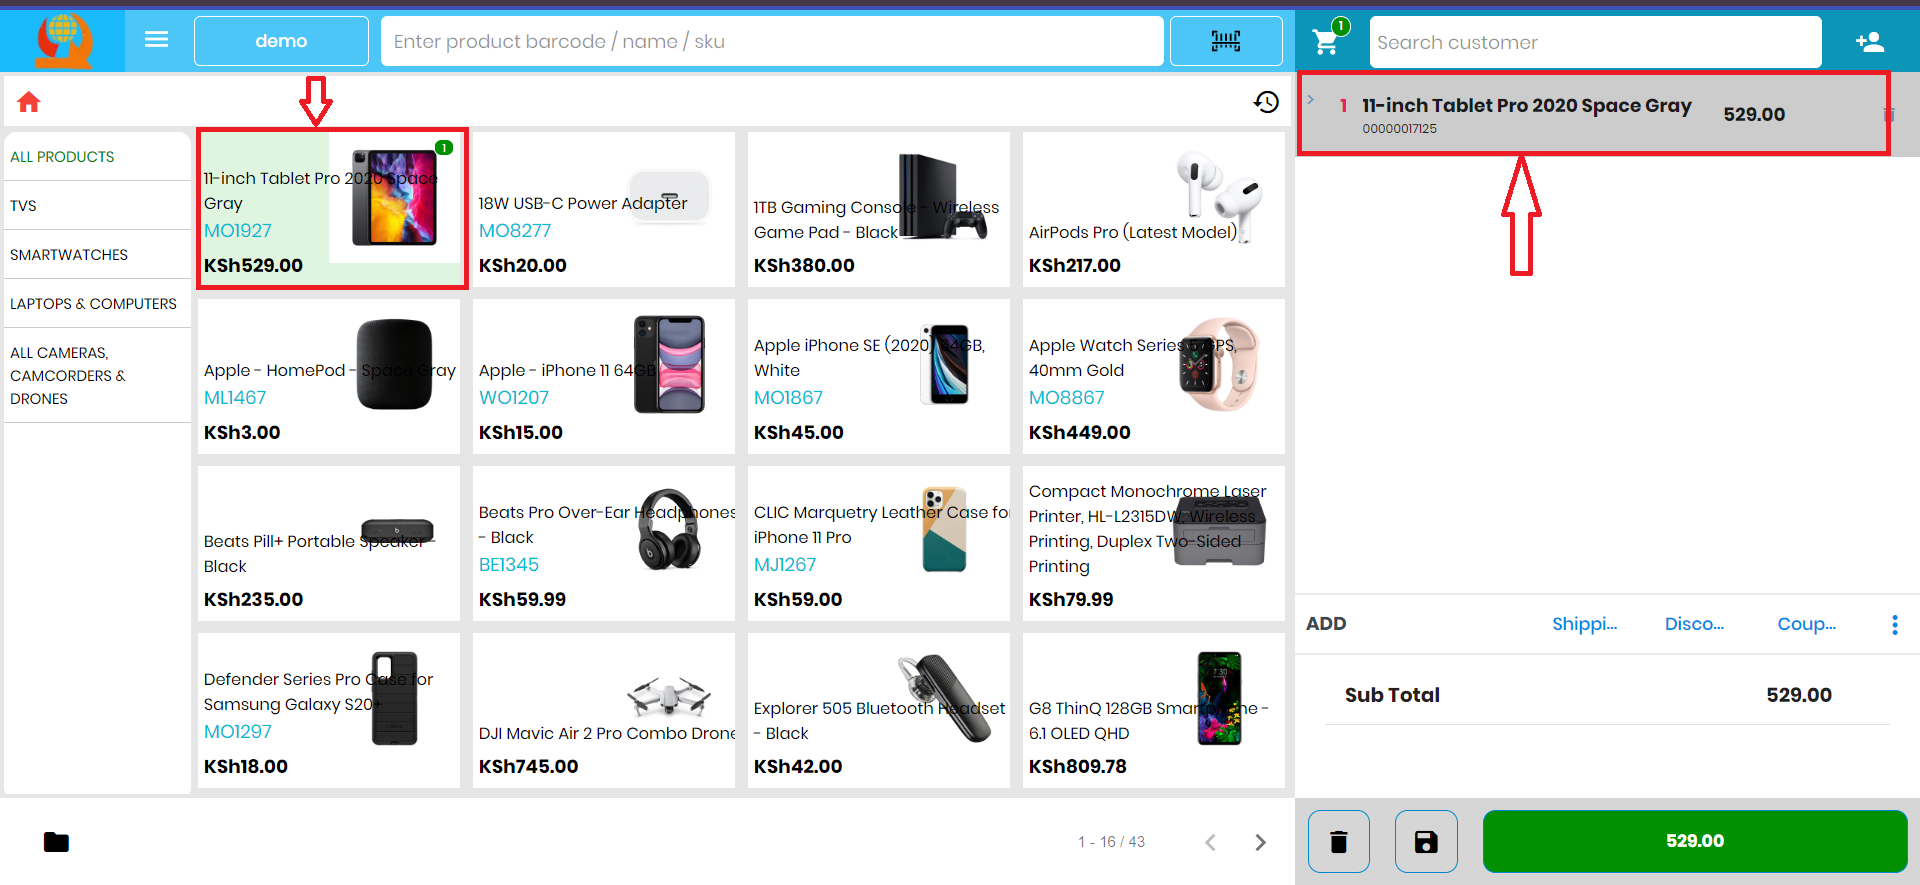
To view the items on the quick links, click the desired quick link and you will see all the items on that particular link.

After a purchase from a customer, view the item purchased then click on the save icon to save the item to record it as a sold item.
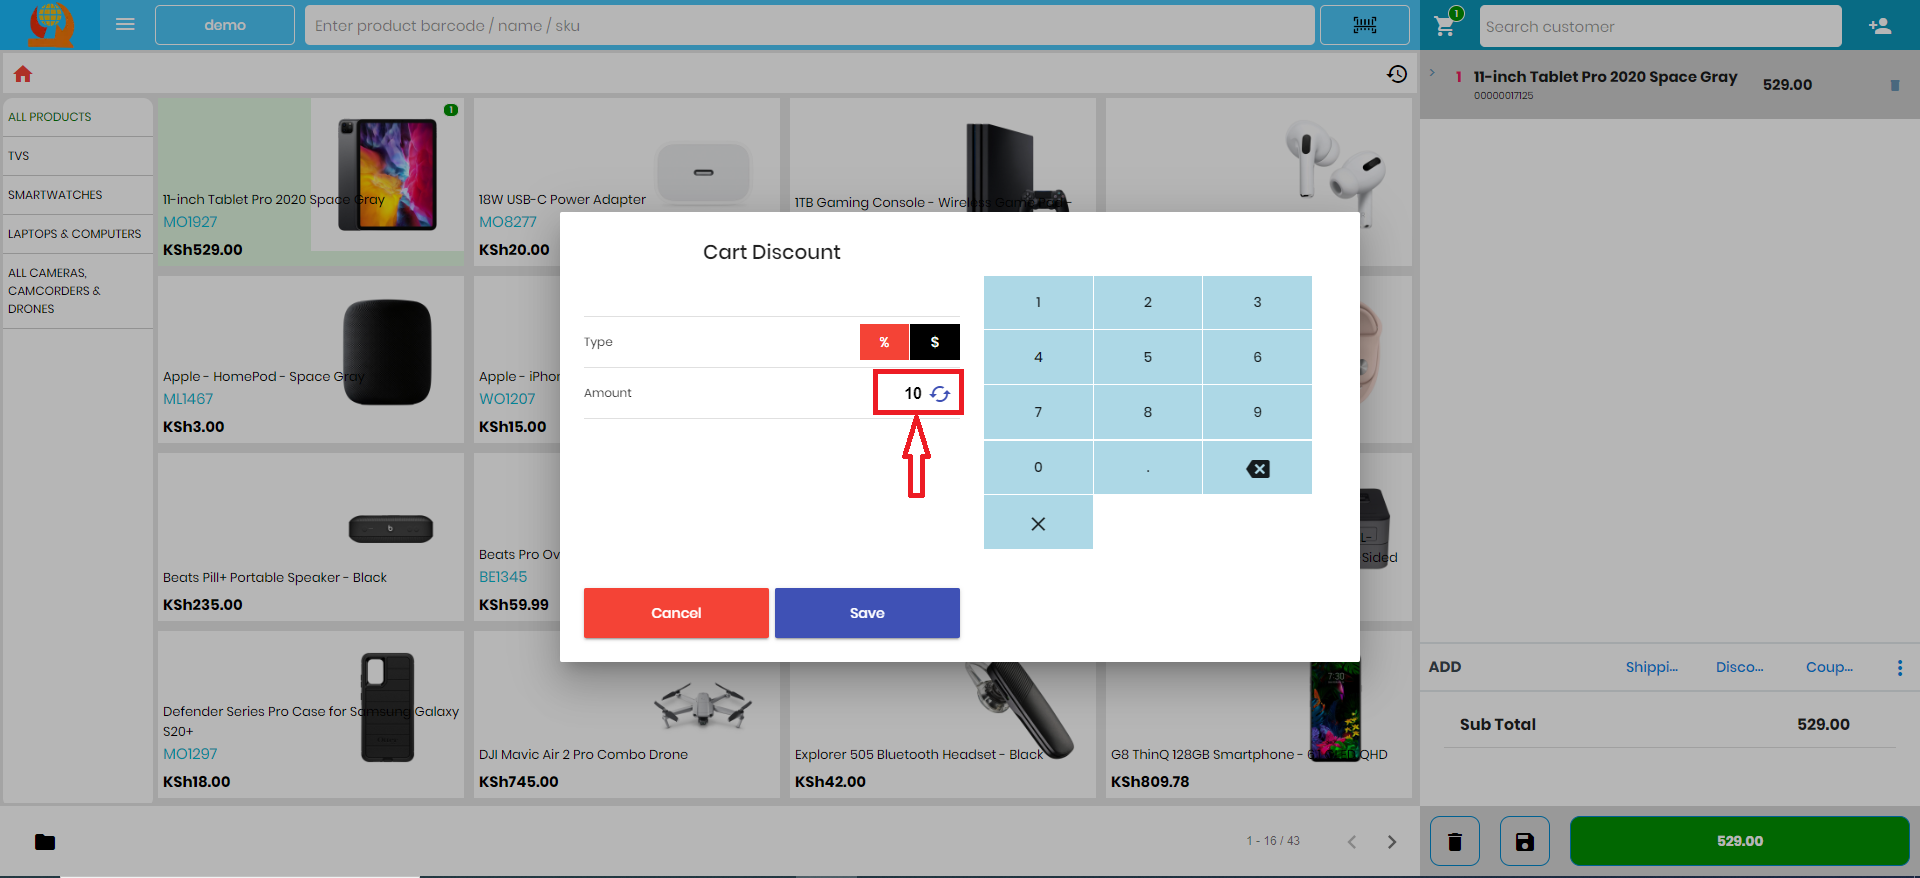
To add a discount to a product, check the "ADD” menu and simply click on the discount button after which a menu will pop up where you can add a percentage discount or an amount discount.

To add an amount discount, click on the discount button and after a menu pop up, click on the dollar sign which will change from black to red when clicked.
Enter amount which you want the discount to be then click save then green button with the totals then enter amount the customer has given.
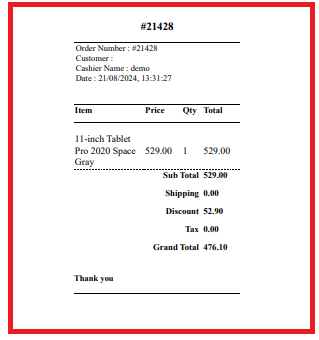
To print receipt for an amount discount, click “Pay” and click print receipt icon.

To give a percentage discount, just click on (%) that is on the “Type” category, key in the percentage discount amount and click on “Save” button.
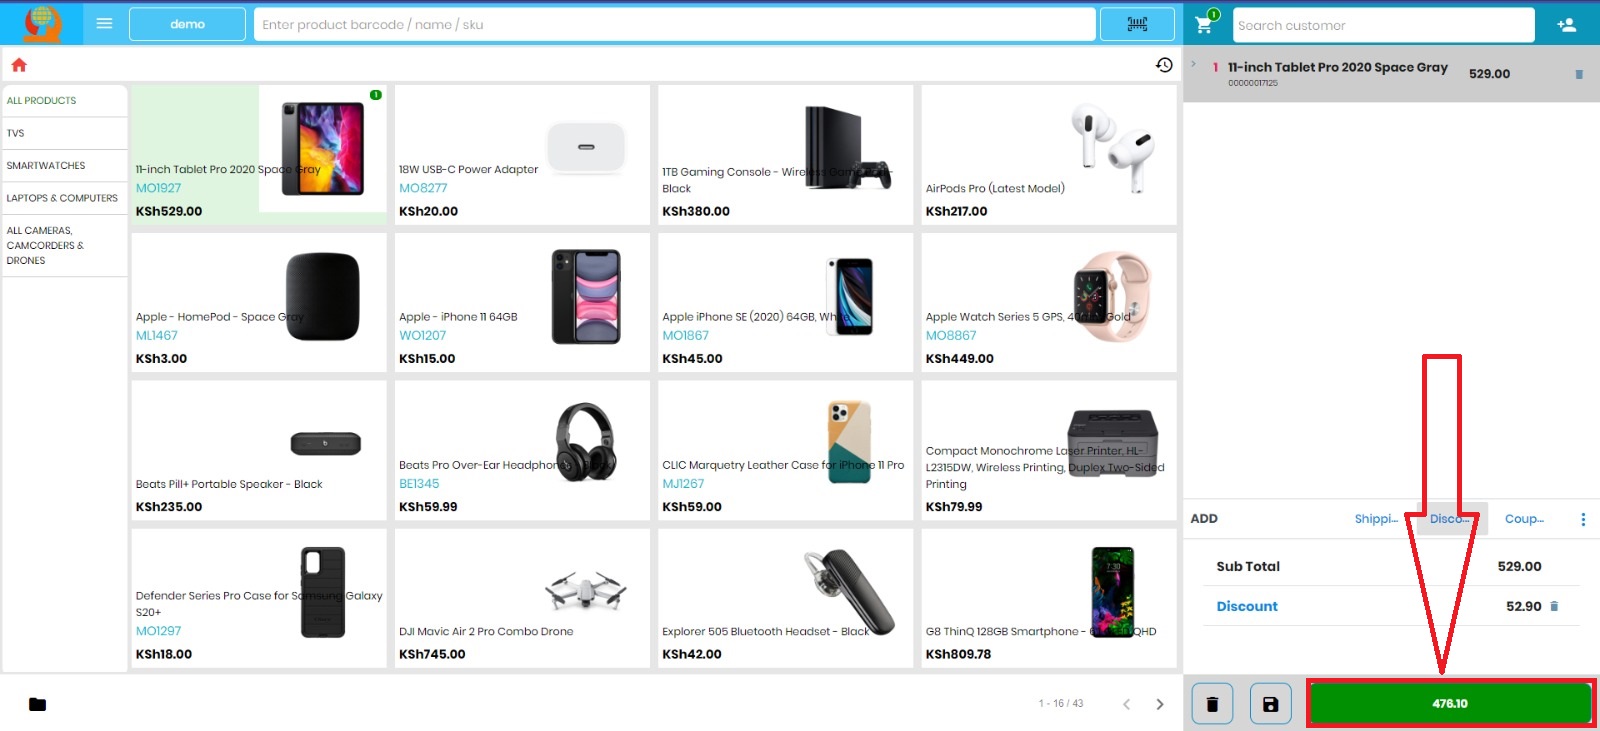
After clicking the “Save” button above, you will view the total after the discount has been applied.
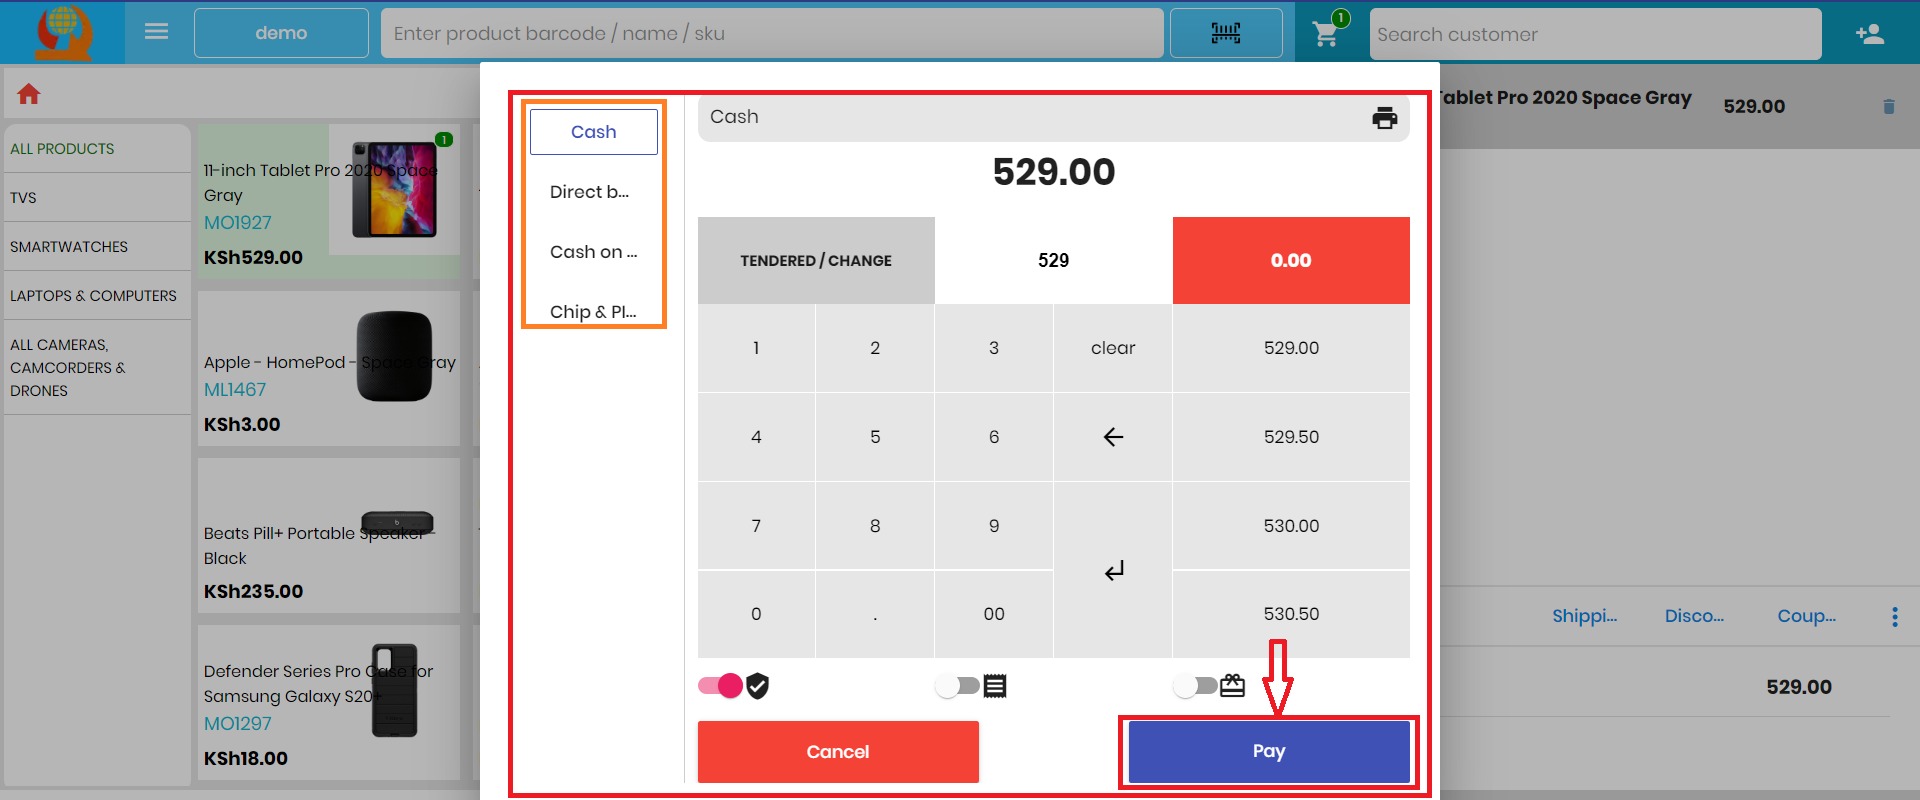
After the discount has been applied where necessary, it’s time for payment and giving change. To do this, just click on the green button where the total is to facilitate the payment process.
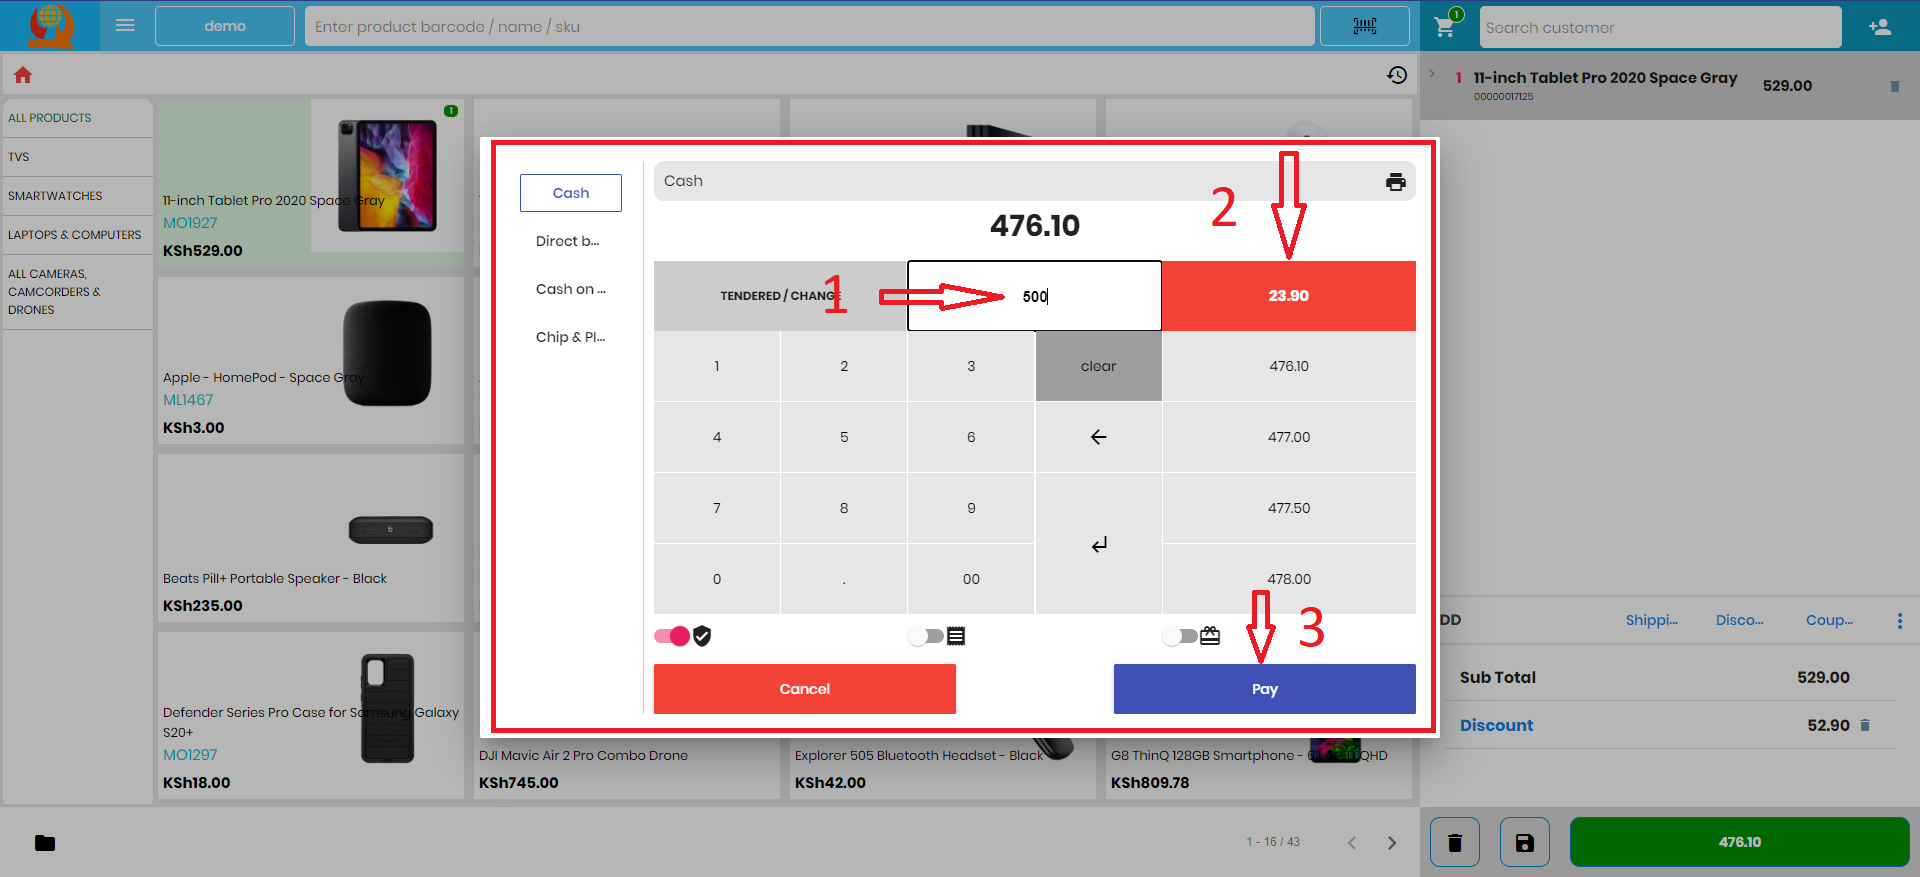
From the side panel you can choose the customer’s payment method to be either cash, Direct Bank Transfer, Cash on Delivery or Chip & Pin. Whatever payment method they choose, just follow the prompts.
After you are done with giving change, click on ”Pay” button and print the receipt by clicking the print icon.
Check also>>> How to Sambaza Airtime on Safaricom.
To navigate or understand the main menu of the POS, just click on the three lined menu on the top left of the page.
To view the summary of the orders made, simply access the three lined menu then click on “Orders” from the menu then you will see a list of all the orders with their Order number, Amount and Time they were made.

To view the summary of the order reports simply access the three lined menu then click on “Reports” from the menu then you will see a report on all Cash sales, Direct bank, Cash on Delivery

To view the summary of the transactions, simply access the three lined menu then click on “Transactions” from the menu where you can see the time the transaction happened, the amount paid and the change given.

To access POS from backend you’ll need to have logged in to WordPress then on the side menu scroll until you see the "POS” button.
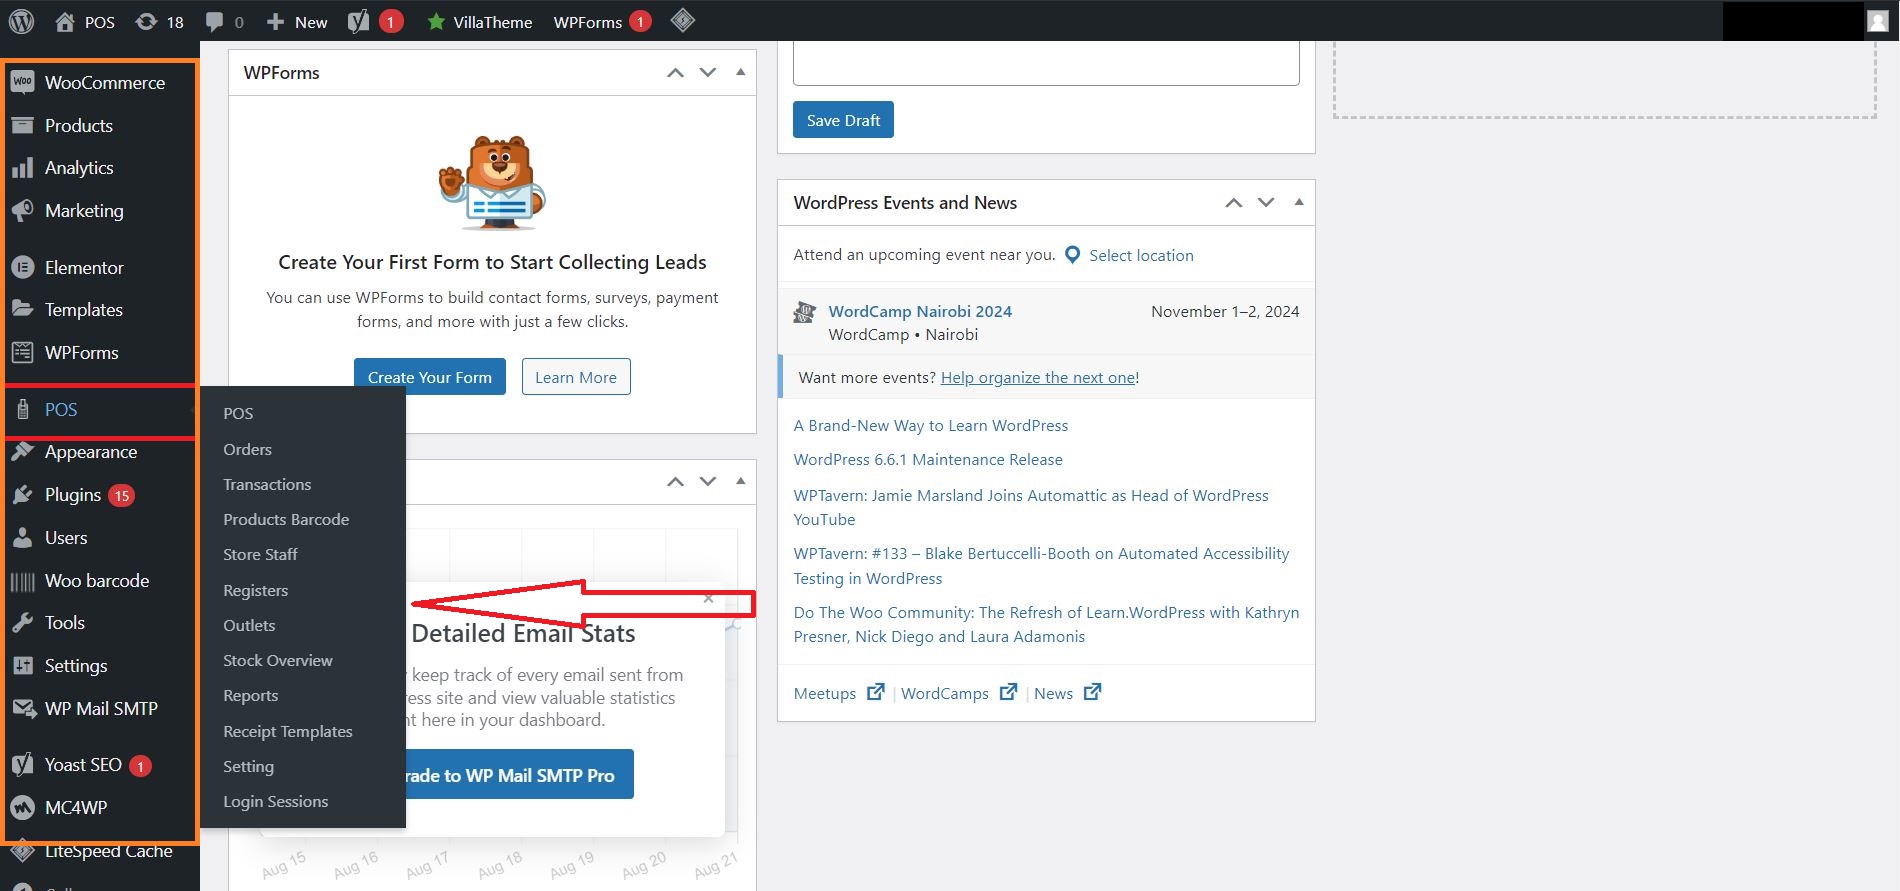
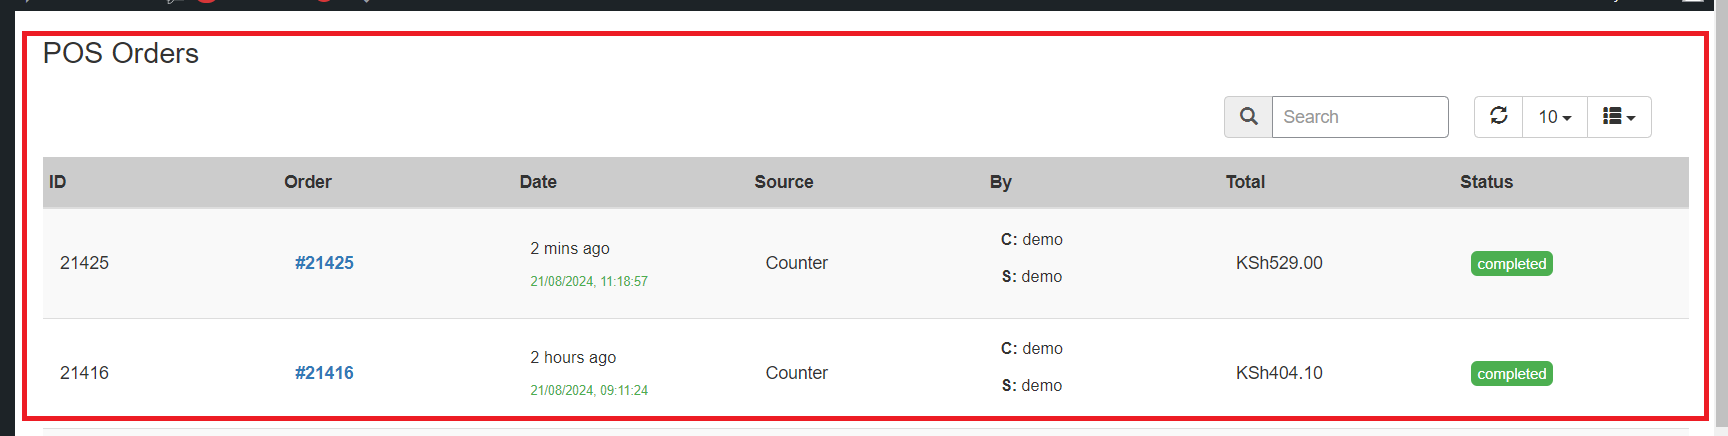
To access orders from the POS backend, just hoover on the POS button and click on the orders from a list on the pop up menu.
Here you can see the:
To access all transactions from the POS backend, just hoover on the POS button and click on the transactions from a list on the pop up menu.
Here you can see the:

Accessing the POS stock overview from backend is just the same as the previously mentioned process, just go to the side panel and choose from the POS menu “Stock overview”
From here you can view:

To view and assess how your stock is performing, this POS stock Reports will help you do that just go to the side panel and choose from the POS menu “Stock Reports”
Where you will be able to view your stock’s:
And that my friends is how to order products online: Step by Step Guide with Pictures from our Ecommerce and POS demo.
In case of any questions feel free to reach out sinosoft.guru or simply contact us and our support team will gladly be of help.

